Showing posts with label Astromechs. Show all posts

Thursday, July 14, 2016

Clear Chrome Plating - Astromechs, Part 4

                I was getting my sorry butt handed to me on the Elite War setting of Heroes and Generals, and decided to peruse Reddit in order to break up the monotony of my ridiculously frequent spawn times. It was during this time that I came across the discussion of the ARC-170 expansion for X-wing Miniatures and was saddened by what I found: not much love for the R3 Astromech. I've been taking a hiatus from X-wing analytical articles, due to a combination of school and branching out to other games, but I've been reminded of something. There'll always be game aspects that are passed over by popular trains of thought and, therefore, need a hint of nurturing to have their true potential shine. Thus, I give you a long overdue Poor Grey Pilot article, heaven knows you deserve it. Let's discuss the possibilities of the R3 Astromech.
                I am eager to see the retrofitted ARC-170 join this game, especially since it adds to the X-wing ship bloodline, but it was the R3 Astromech that most intrigued me from the Wave 9 teaser. The R3 Astromech has four main aspects attributing to its strength: it provides protection against dice fails, it increases action economy, its generic, and (like the FFG article said) it synergizes well with Rebel builds.

1) Protection Against Dice Fails
                Repositioning power has always been the strongest aspect of X-wing Miniatures, but there is no point getting into the right position if the dice fail. This pitfall was overcome by the basic blueprint of arc-dodging ships introduced with Imperial Aces. You attach Push The Limit to a high PS Ace, in a ship fast enough to deal with the stress tokens, and you now have enough action economy to reposition and prevent dice failure.
                However, Rebels have a hard time reproducing the arc-dodging success seen with Imperials, whether its because of the A-wing's 2 attack dice, the E-wing's high cost, or the T-65's lack of mobility. This struggle can be seen in the development of how I've run Wedge Antilles. Previous ship building standards in X-wing dictated that a solid Wedge build look something like this:

X-wing w/ Wedge - 40 points
                Predator
                R2-D2
                Engine Upgrade

                This X-wing gets repositioning power from an EU, but the lack of an evade action means that you can't get much use out of Push the Limit, therefore requiring expensive upgrades to protect against dice failure on both offense and defense. This leads to a powerful, albeit expensive, Wedge that absolutely needs to be protected by Biggs in order to make it to the late game, and with that you've already spent 65 squad points. So I experimented to see if I could find a cheaper alternative that gave similar power. This led me to my creation of Stay on Target Wedge.

X-wing w/ Wedge - 33 points
                Stay On Target
                Targeting Astromech
                Integrated Astromech

                This clever combo gives Wedge both repositioning and a target lock, allowing you to get into the right place and make sure your attack doesn't fail. We've used the astromech slot and can no longer take shield regeneration, yet this is compensated by the IA and a 7 point savings. But, there is still a fundamental problem that hasn't been fixed, which is that Wedge overly relies on devastating offenses and can't modify defense dice. This weakness can be solved with the R3 Astromech.

X-wing w/ Wedge - 35 points
                Lone Wolf
                R3 Astromech
                Vectored Thrusters

                We now have a well-rounded Rebel Ace costing the same as Soontir Fel, but who doesn't need to self stress. Wedge uses his PS 9 and barrel rolls to get behind enemies. He then attacks with 4 dice, rerolling a blank, and converting a focus result into a precious evade token. We have successfully given Wedge repositioning, protection against any dice fails, and a decent cost.

2) Gives Action Economy
                As seen by my final Wedge build, the R3 Astromech and Vectored Thrusters were made for each other. Together, these two upgrades provide cheap action economy to ships that can't properly use PTL. This breathes new life into X-wing Aces, who now have action economy that jives well with their ship. Wes Janson doesn't mind as much if his attack misses, he generally wants to soften targets for allies. Use him to strip enemy tokens, then take an evade to turtle up. Consider giving him Veteran Instincts to make more use of his barrel rolls, or equipping Juke for even more action denial. If you are in the market for something tankier, take Luke instead. His pilot ability synergizes well to make a more durable X-wing arc-dodging ace.

X-wing w/ Wes - 33 points
                Adaptability
                R3 Astromech
                Vectored Thrusters

X-wing w/ Luke - 34 points
                Lone Wolf
                R3 Astromech
                Vectored Thrusters

                Another great application of action economy is the E-wing. With R3 and the Fire Control System, we have a Corran Horn that can barrel roll, target lock, and evade. Moreover, Corran can use his double tap in a similar fashion to Miranda Doni. He dives on his first attack, using R3 to get an evade, and FCS to get a TL. Then, during the end phase, his pilot ability activates and he can hit hard and dodge away next turn. Another thing to note is that R3's wording says you assign an evade token, rather than perform a free evade action. This allows the possibility of double evades and we can use R3 to replace R2-D2 + Sensor Jammer on Etahn A'baht, a 5 point savings, with a freed systems slot.

E-wing w/ Corran - 39 points
                Adaptability
                Fire Control System
                R3 Astromech

E-wing w/ Etahn - 39 points
                Push The Limit
                Fire Control System
                R3 Astromech

Lore Break
                Here we will pause to take a refreshing lore break. The R3 astromech, in the Star Wars universe, was designed to hold a powerful sensor array, and a stronger battery to power it. To prevent sensor interference, the regular astromech dome of the R2 was replaced with a clear one, the telling feature that distinguishes between the two models. This lore is reflected in R3-A2, who uses its sensors as electronic warfare to stress the systems of enemy fighters. It is also seen in the Salvaged R3 Astromech, whose strong power source provides the equivalent of a shield token to Scum ships. Since shield and evade tokens are quite similar, mechanics-wise, we find that the R3 Astromech does a job like that of its Scum counterpart. However, it is far more powerful for the same point cost. All you need is for one evade token to block a hit and you've matched the power of the Salvaged R3, plus you don't need to wait for a Ship-based critical to activate.

3) Generic Droid
                Our third aspect of strength is that the R3 is an unnamed droid. While you won't be fielding multiple R3s in all your squads, the option to do so if both powerful and liberating for squad building. You could have fun with a list of 3 Juke Red Vet X-wings. Or perhaps you want to capitalize off the cheap action economy and field an all ace list, such as Wedge, Wes, and Luke. Since R3 activates after your ship shoots, you'll want it on higher PS pilots, so low PS squads won't get much use from this droid. Yet, even then, it might be worth the risk so you can laugh as generics TIE Fighter or Headhunter swarms futilely try to break your defenses.

T-70 w/ Red Vet - 33 points
                Juke
                R3 Astromech
                Comms Relay
                Integrated Astromech

4) Rebel Ability Synergy
                FFG claims that the ARC-170 is well priced. If it is indeed, it won't suffer the same defect as the E-wing, namely players overrelying on shield-recharge droids to protect their high point investment. This scenario led to the sad result that R7 droids are rarely used on the ship they were intended for. Let's hope the same won't happen to the ARC-170 because the R3 synergizes so well with it. You can put an R3 on Shara Bey, thus allowing her to survive longer to help her allies. And it is a perfect fit for Norra Wexley. Her ability, when combined with an R3, allows her to turn her target lock action into the evade action. If you then slap on Veteran Instincts, you optimize the benefit of your droid and keep Norra's cost low.

ARC w/ Norra - 34
                Veteran Instincts
                R3 Astromech
                Alliance Refit
                Vectored Thrusters

                Another great pilot with R3 synergy is Horton Salm. This Y-wing Ace who has always been plagued by focus results on his attacks. I played with this combo for awhile but almost gave up since R3 doesn't work with turrets, but then I remembered an old project of mine: the "Hort-hog". It was a silly attempt to justify putting the BTL-A3 Title on Horton, but I never found a combo that worked. Now, with R3, it actually makes sense. This build is about timing. At range 3, you play conservatively, but at the opportune moment, you slip into range 1-2 and blast away! For one more point, you could try replacing the Dorsal Turret and Vectored Thrusters with a Twin Laser Turret.

Y-wing w/ Horton - 32 points
                Dorsal Turret
                R3 Astromech
                BTL-A3 Title
                Vectored Thrusters

Conclusion
                Whether its offering alternative action economy or strong Rebel synergy, there are many applications of the R3 Astromech. I hope that this article gave you some new ideas and I wish you the best in your squad building. Happy Flying!

Monday, March 21, 2016

60 Portions! - Deciding Which Astromech Your Rebel Pilot Should Take Part 3

                Today I am proud to present the third part of my thread discussing the droids available to the Rebel Faction in X-wing miniatures. Click here for Part 1 and Part 2, or here for Scum Astromechs. We will be looking at the three newest droids, discussing the best ways to use them, and applying them in squad building. Let's jump right in.

BB-8
                Moviewise, BB-8 was specifically designed to be the new and loveable droid sidekick in Star Wars. So it is also fitting that he joins R2-D2 as the main droid ally of an X-wing Miniatures Core Set. Since BB comes in a core he is going to be one of the more common droids found in Rebel players' arsenals. Let's get to know how he works and make the most of him.
                BB-8 gives a ship access to a free barrel roll. BR is the main action needed for good arc-dodging ability and so our droid gives more utility to higher PS pilots. And since his ability activates when you pick a green move while unstressed, BB's power is equivalent to the number of green maneuvers a ship has. E-wings and T-70s will get the most use with their 5 greens. Like R7-T1, BB-8 can give a movement actions along with better action economy. However, this means that you can't take a shield regeneration droid, so be sure to weigh your options carefully before picking. In regards to the T-65, we get a little less utility with only 4 green moves. But this is compensated by the fact that BB-8 gives the original X-wing a movement action, a feature that has long hurt it in the meta game. Flying Wedge or Wes with BB-8 and Integrated Astromech are builds that are both powerful and very fulfilling. Finally we come to the Y-wing. While the idea of this ship with a Barrel Roll action sounds awesome, it really doesn't work. With only 2 green moves, the Y-wing doesn't get enough benefit from BB-8. And the two moves are slow which doesn't give enough area for the BR to cover, making the combo both limited and predictable.

T-65 w/ Wes - 32 points
                Veteran Instincts
                BB-8
                Integrated Astromech

T-70 w/ Poe - 36 points
                Veteran Instincts
                BB-8
                Autothrusters

                When we take a look at BB's game mechanics we find that he is quite similar to a B-wing with Advanced Sensors. As long as you pick a green maneuver and barrel roll the right way, the combo makes sure you are never blocked and always have an action. This also means you can hug the asteroids more closely, a skill that can give you an edge over your opponent and give your ships good cover. BB-8 also can be paired with Push the Limit for more effective action economy. Taking your free Barrel Roll action triggers your EPT for a second action of your choice. You then perform your green move and clear the stress, thus allowing you to take a third action during your normal Perform Action Phase.

T-70 w/ Ello - 35 points
                Push the Limit
                BB-8
                Integrated Astromech

R5-X3
                In the Star Wars Extended Universe (now Legends) there was a time when a new shipment of astromechs arrived for the Rebel Alliance. Wedge Antilles was disappointed that they had received R5 droids instead of the better R2 model. However in a attempt to stay positive, our Ace made the humorous comment that his R5's huge dome could take a hit for him. So leave it to the X-wing developers to go and make Wedge's wish come true. Well played, FFG. Well played.
                R5-X3's ability appears rather underwhelming when you first look at it, especially since it is a one shot item. But upon a closer examination, we find that the card's wording applies from the activation phase to the end phase. This means that for one entire round, your ship with X3 gets an ability that is more powerful than Dash Rendar's. When you spend X3 you can move over asteroids without rolling for damage or losing your action. Debris clouds don't give you stress or make you roll for criticals. You can even land your base on an asteroid and still get to fire! But it doesn't end there. The card says that "you ignore obstacles" instead of "obstacles don't apply to you". This means when you fire, your shot is not obstructed by any asteroids in the way. But when enemies fire back they still have to apply bonus dice to you for your obstacle cover.
                So we have a powerful ability. But is it strong enough that one round matters? The answer is yes. It will require a lot of work and practice, just like when flying Dash. In all the games I have played against Dash he always followed the same pattern. First he strafes down one side of the board, both attacking and fleeing. Your squad eventually catches up to him and you try to block him. One of two things has always happened to me in this part of the match. Either I get the block and take him down, or else he escapes through obstacles and starts another strafing run down the board. If the latter, my squad strength is usually is so low that taking him down is near impossible. Dash only needs that one opportunity to turn the tide of the battle and stay alive. And it is the same with R5-X3.
                Consider the example of a Gold Y-wing with a Twin Laser Turret. The Range 1 gap is a weakness that needs to be shored up in your squad building. Perhaps you take multiple TLTs to cover blind spots or maybe give your Y-wing a Bomb Loadout so it can avert enemies from flanking. But if we equip X3 then we have a Y that can act like Dash. Your TLT can strafe down the side and hug close to the asteroids. Then when the enemy thinks that he has closed in on you, pop the droid and make your daring escape. Rather than being a sitting duck in one spot, you are in a different spot entirely, under the cover of an asteroid, with a focus token, and can fire back unobstructed.
                 X3 is great on Y-wings to make them less predictable. And the turret allows you to make use of all benefits: movement, action, and shooting. However, things are different when it comes to X-wings. I wouldn't put R5-X3 on just any X-wing build since he cannot pair with Integrated Astromech. Consider putting him on an X-wing that uses Guidance Chips or Autothrusters. As for the E-wing, the ship generally requires a stronger astromech to protect your point investment. Perhaps a viable combo will come after a (hopeful) E-wing revamp.

Y-wing w/ Gold - 25 points
                Twin Laser Turret
                R5-X3

T-70 w/ Ello - 34 points
                Veteran Instincts
                R5-X3
                Autothrusters

                One final thought on X3. He might see more use in the meta with the introduction of the Tractor Beam. Things are going to get dicey for small ships pretty soon, especially X-wings and Y-wings with their lower agility. If you take X3, your small base ship has a "Get Out of Jail Free" card. You can pop your droid the round you enter combat range to make sure you can still attack if you are barrel-rolled onto an obstacle. Or you can save it till after you have been rolled onto an asteroid and use it the next round to make a clean getaway. It can be a strong defense on a low agility/low pilot skill ship in your squad.

X-wing w/ Rookie - 22 points
                R5-X3

Targeting Astromech
                The first thing the Targeting Astromech brings to X-wing is the incentive to make red moves, just like with Wired or the Outlaw Tech. The TA means you no longer have to sacrifice dice modification for repositioning. You can K-turn or T-roll and still have a powerful attack. And if you don't use it that turn then you have it for another round as you chase an enemy. It also frees up the Y-wing's slow dial. Now you can take a hard 3 turn or a 4 forward to slip past an enemy who thought you were going to move slowly.
                Just like with BB-8, the power of the Targeting Astromech ties directly to the dial of the ship it is equipped on. The more red maneuvers you have, the more diverse options you can use. But there is a flip side: you have to clear your stress to keep using the combo. So the droid also requires green moves to be powerful. The T-65 only has only 1 red move and the E-wing only 2, so most of these pilots won't get much use out of a TA. The Y-wing has 4 red moves and so is very strong with this droid. But only having 2 green moves makes clearing the stress difficult, so you have to use it very strategically. And finally we have the T-70. With 3 red moves and 5 green moves, this ship almost begs for a Targeting Astromech. The combo has strong maneuvering power on the board and can always hit hard. And since you are getting good dice modification, you are free to replace EPTs like Push the Limit or Predator with ones like Veteran Instincts or Stay on Target.

T-70 w/ Novice - 26 points
                Targeting Astromech
                Integrated Astromech

T-65 w/ Wedge - 33 points
                Stay On Target
                Targeting Astromech
                Integrated Astromech

                Another favorable application of the Targeting Astromech is in using Ordnance. The droid makes it possible to K-turn behind an enemy, take a Target Lock, and still fire a torpedo. For example, we can take Hobbie with a Flechette Torpedo and the TA. He can K-turn and use his ability to shed the stress when he acquires the Target Lock. This leaves him stress-free to take a focus token during the Perform Action Phase. Then he can fire a modified torpedo to stress an enemy while he can perform any maneuver you want next round. And even when your ordnance is spent, you can still use the combo for shots modified by both a TL and a focus. Another strong Ordnance combo is with a Gold Y-wing. The Targeting Astromech lets him push it a little closer to the enemy, allowing him to get the Target Lock where he otherwise would not have.

Y-wing w/ Gold - 26 points
                Proton Torpedoes
                Extra Munitions
                Targeting Astromech
                Guidance Chips

T-65 w/ Hobbie - 29 points
                Flechette Torpedoes
                Targeting Astromech
                Integrated Astromech

Conclusion
                Whether you are a fan of barrel rolls, ignoring obstacles, or getting rewarded on red moves, these three new droids add a huge variety to Rebel gameplay. I hope you enjoyed this X-wing analysis and learned something new to help you with your squad building. Thanks for reading and best of luck in solving the challenges that you face in your games. Poor Grey Pilot out.

Monday, November 30, 2015

You Near-sighted Scrap Pile! - Deciding Which Salvaged Droid Your Scum Pilot Should Take

                A few months ago I did a double part special looking at the different Astromechs that the Rebellion had access to. (Part 1 & Part 2) And in the same Poor Grey Pilot fashion I took a look at each droid, how they fit into the current meta, and how we could get some use out of the less popular ones. Today I am continuing that thread by taking a look at the Salvaged Astromechs. I put off this analysis for a while on the basis that Scum ships have too few ships that use Astromechs. However, with the BTL-A4 Warthog now in use, and the Punishing One announced, I feel there is adequate material to discuss.
                To start off I just want to say that I am happy that FFG made Scum droids a separate category of upgrade. Not only does this give more unique identity to both the Rebel and Scum factions, it also fits more with the lore. During the time of the Galactic Civil War the Empire had placed a monopoly on astromechs. None were to be produced or shipped without the knowledge and approval of Imperial Authority. The main reason the Empire did this was because they knew that the Rebel Alliance's fleet was mainly filled with Y-wings and X-wings, starfighters that were reliant on droids.
                We can see how both the Rebels and the Scum & Villainy of galaxy reacted to this economic embargo. The Alliance used its many connections and strong moral stance to open up several good supply lines, for example with smuggler Nera Dantels. Furthermore, Admiral Akbar and other Rebel leaders began pushing for mass production of the A-wing and Blade Wing prototypes the Alliance had, both of which were fighters that did not rely on astromechs. On the flip side, Scum factions fell back on what they did best: cunning and self-reliance. Instead of being dependent on mint astromech supply lines, they turned to restoring and remaking used droids. These salvaged astromechs work just fine for the grungy pirate fleets and add a new, fun flavor to the droid scene in X-wing Miniatures. Let's take a look at each one available so you can decide which droid your Scum pilot should take.

"Genius" - R5 Model - 0 Points
                Haha, the first time I saw the art on this card I thought that Genius was sitting around while his master worked on the back of an X-wing. I couldn't figure out why a Scum pilot would have such a ship but after a second glance I realized that he is actually working on Genius's body. The poor droid's portrait for the game was taken while he was receiving maintenance! This actually gives an actuate picture of how he operates: the user needs to be a bit headless to charge in on crazy bombing runs.
                However, not many people fancy this droid. That is because they only see him as a suicide bomber. But that doesn't make sense to me. If you aren't willing to make a few risks to gain the upper hand then you aren't a Scum pilot! Many players find it is viable to take Z-95's with Feedback Arrays. It is the same tactic. And honestly, Y-wings can do it better because they have more hull to work with. Take a Thug pilot with Proton Bombs and Genius and he can sacrifice one of his own hull points to give out a critical to each ship in a swarm or to a low-hull ace. This is very effective versus fragile enemies like TIE Fighters, E-wings, A-wings, and Sycks. But what most people haven't realized yet is that Wave 7 brought a non-lethal type of suicide bombing. The introduction of Ion Bombs is a unique ion mechanic because it deals no damage, only ion tokens. This means you can have a Genius Bomber that won't hurt itself. You can then take it to the next level by equipping an Autoblaster Turret and Extra Munitions. Your Y-wing is now a death trap for small base swarms. Fly your bomber at the formation, drop an Ion Bomb with Genius, ionize everyone, and attack with your Autoblaster. Then everyone takes the ionized move next turn and you are once more in Autoblaster range.
                Another thing that many people haven't connected yet from Wave 7 is that Genius is a SLAM Bomber. A vast number of players wanted to use the K-wing's SLAM to drop bombs and weren't happy when the ability was removed from the game. If SLAM Bombing was really your heart's desire then you are in luck: Genius provides the same mechanic to Scum bombers and he is still legal. And you can do something that no K-wing ever could by putting Stay on Target on Kavil. Now we have a high PS ship with bombs that can turn on a dime to hunt low PS swarms. Then top off the combo by giving Kavil an Autoblaster Turret with 3 attack dice.
                There are two more things I want to say about Genius. The first is one that everyone knows: try him with an engine upgrade. That way you have a Y-wing that can move, lay a bomb, and then boost away. For a few extra squad points your bomber no longer needs to be suicidal. It is a fun combo and I recommend trying it out! The last things I want to mention is that there is a gap in Scum meta right now. In my Advanced Bombing article I talked about how there is a unique ship for both Rebels and Imperials that is a dedicated Advanced Bomber. Scum players have the Andrasta but they don't have a single ship to fill the dedicated Advanced Bomber role. Maybe Nym's H-6 Scurrg Bomber? The ship has both astromech and bomb slots. And it already appeared in Armada so I feel there is a good chance we could see it in X-wing. Keep your fingers crossed!

Unhinged Astromech - R5 Model - 1 Point
                The Unhinged Astromech is our first generic Scum droid and it can do some crazy things that it's Rebel counterpart can't. An Unhinged on a Y-wing or Warthog not only gives the ship some much-needed green moves, it turns the 3 speed hard turns from red to green. This really frees up the ship and gives it more speed and maneuverability. It is a bargain benefit for just 1 point but it doesn't end there. The Jumpmaster 5000 was introduced and FFG specifically announced that the ship would have an "asymmetrical dial". In an interview, Alex Davy revealed that the ship will have green turns to the left but white and red turns to the right. This was meant to create a unique mechanic for ship flying, but more importantly it was also meant as a detriment to the ship. It can come in at a cheaper squad cost, in my opinion, for having such a bad and predictable dial. But for just 1 point we can give the Jumpmaster an Unhinged Astromech and we have a good chance that the 3 turns will be changed from asymmetrical to symmetrical. This is just my speculation so I guess we'll have to see what happens.

Salvaged Astromech - R3 Model - 2 Points
                While our Unhinged R5 Droid had his head played with to give a different movement mechanic, the salvaged R3 unit has nothing to do with making green moves. These droids were probably little more than empty shells when Outlaw Techs got their hands on them. After rigorous reprogramming, these Salvaged Astromechs were turned into spare power generators.
                The Leebo crew gives you an Engine Upgrade for half the points but pays for the discount by giving yourself an ion token. It is the same for the Salvaged Astromech. He essentially gives you a shield upgrade for half the cost but pays for the discount by requiring that you apply the droid to a Ship-based Critical Hit. So you might get an extra hit point for half-off or you might not even use it as your ship is destroyed by normal hits. But honestly, while Leebo isn't the best investment, the Salvaged Astromech is. Both the Y-wing and the Jumpmaster have 5 hull and therefore have a very good chance of taking a ship-critical and using the droid. And if you give your ship a Hull Upgrade you not only get one more hit point, you increase the likelihood the SA will activate. That means you can get a 2/1/6/4 Y-wing or 2/2/6/5 Jumpmaster for only 5 more squad points. And since it is generic you can put it on multiple ships. A rather great bargain, if you ask me.

R4 Agromech - 2 Points
                Industrial Automation was the company that invented the R-series Astromech. Seeing their business sharply decline with the embargo on Space Droids, they decided to open up a new market. They took their R4 Astromech Series and made a few modifications to it. These changes allowed the droid to house agricultural memory banks rather than aerospace banks and they named it the R4 Agromech. And they actually saw good success with it. However when Scum factions saw it on the market they found they had a golden opportunity. Not only did their technicians find it rather easy to reverse-engineer the memory change, they quickly found that they received no Imperial repercussion for buying the droids en-masse. They continued to call them "Agromechs" but now the name meant Aggression. Quite a clever and poetic move.
                There are many applications of the Agromech and all of them are downright fun, especially since the droid is generic. Warthogs with a TLTs or Ion Turrets can now have more action economy to give modification on offense. And an Agromech Y-wing or Warthog can efficiently use a Blaster Turret. You spend the focus to fire the weapon and have a target lock to use for modification. You can also use the Agromech to give Fire Control Systems to your Y-wings. During the Alphas Strike you fire with your primary weapons and a focus token. While 2 attack dice won't do much you will get a free Target Lock. Then you can move into range 1-2 the next round for a powerful torpedo shot with both TL and Focus.
                The Agromech will also find a good home on the Jumpmaster. You could take him for the free Target Locks but there is another application. Consider taking Dengar with the Punishing One title and an R4 Agromech. Specifically, the Agromech requires you to spend your focus on an Attack and Dengar's retributive strike ability is considered an Attack. That means the Bounty Hunter can use the Agromech to punish higher PS pilots. If Wedge or Vader shoot at Dengar inside his firing arc, he can attack back and use his focus token without thought. Then he receives a Target Lock and fires once more during normal combat order. The Scum fleet has very few pilots with PS 8 and 9 but it is doesn't matter because they have so many abilities to punish enemy Aces.

R4-B11 - 3 Points
                The final droid in our arsenal is the B11 droid. This creepy little guy was the work of a rather sinister pirate. He acts as a reverse R7 droid. Instead of letting you spend your target lock on your defense, it lets you spend your target lock to mess with the enemy's defense. It is a powerful combo that lets you make the most of your actions. But more importantly it can help you break powerful enemies with high agility. The droid terrorizes ships like Interceptors and E-wings that rely so heavily on their evade dice. B11 paired with a turret turns a ship into an efficient hunter of arc-dodgers. So consider putting him on a Y-wing with a Twin Laser Turret and flying the ship on your squad's flank to prevent enemies from sneaking around behind. Experiment with him and see what kind of combos you can create.

                So there you go, my Scum friends. Five different Salvaged Astromechs to choose from. And if you look at the preview of the Jumpmaster 5000 we find that there are two more droids on the way! Which will you pick for your squad needs? Let me know in the comments below. Thanks for reading and have fun flying those pirate strategies!

Friday, August 14, 2015

I've Got A Problem Here...Deciding Which Astromech Your Rebel Pilot Should Take, Part 2

                As promised, here is the second half of the Astromechs in the X-wing Miniatures game. So let's jump right in and discuss the R5 and R7 series.

R5 Astromech - 1 Point
                The R5 is our second generic droid in the game and a great one at that. His ability of turning ship-based criticals facedown can be a real game changer. An R5 unit may be the difference between dying right then or staying around just a little longer to dish some back at the enemy. There are 33 cards in the damage deck and 25 of them have the Ship title. Of those only 6 aren't fixable by R5 because they take immediate effect. This means that equipping an R5 unit gives you a 58% chance of not suffering the effects of a critical damage.
                If you pair R5 with the Determination talent then that number jumps up to 82% and adds a 24% chance of not taking hull damage. I love running this combo with a Hull upgrade on Ace X-wings (there is a reason R5 comes in Wedge's expansion). It's worth it to put on generic X-wings as well. It can be a pressure-reliever on yourself to have your squad fitted with R5s and not have to worry about random criticals ruining your gameplay. R5 on an X-wing means you won't lose valuable attack dice, take damage from your own K-turn, or lose your precious focus token from a damaged console. And if a Direct Hit lands on your first hull then R5 can actually reduce it back to only one damage!
                Since R5's ability only affects hull points you don't want to take him on an E-wing. On the flip side, however, this doesn't make the Y-wing a great choice. The Y has such a low damage mitigation that the enemy can rip through your 5 hull before R5 even has a chance to take effect. It would benefit you more to give your Y-wing a boost in movement or agility.

R5-D8 - 3 Points
                D8 is the game's repair droid and works really well against two Ties in a Beginner game. However, once you move onto Standard games D8 becomes vastly underpowered. There are so many guns in a 100 point match that actions really become pivotal. So it is not cost effective to give up your action and roll a chance die to repair. If you want a repair ability then it is much more cost effective to pay for R2-D2. For just 1 more point you get a guaranteed shield recharge and it doesn't cost your action.
                Honestly, the only viable application I have seen of D8 in the Standard game is when you fly him with Jek Porkins. This pilot can remove stress automatically but there is a chance he will damage his own ship. If that happens then we have a unique opportunity: using D8 isn't really isn't a waste of an action because you normally wouldn't have that action in the first place! And if Jek doesn't damage his own ship he is free to use that action for a focus. The combo is powerful because the numbers are in your favor. Jek only has a 38% chance of hurting his X-wing but if he does then D8 has a 63% chance of repairing the damage. If you do repair then you don't get the free action but the stress is still gone and the X-wing isn't limited in its movement next turn. If Jek receives a damage and D8 fails then it kinda stinks but there is only a 14% chance of this happening. So if you love riding the edge of disaster to get better performance then this is the combo for you.
                Not only is this paring effective, it is also iconic. D8 is the droid that Porkins has in the movies and comics. In dogfights before Epsiode 4, Jek was an amazing pilot that pulled risky stunts to beat the enemy and had D8 to back him up. However his luck ran out during the Battle of the First Death Star. In a strafing run with Biggs, Jek's ship was pelted by shrapnel from the surface. Jek tried to keep control of his stressed-out ship but in the process he damaged his own engines. D8 wasn't able to fix the problem in time and the sluggish X-wing was caught by turbo laser fire. But even in death he still helped save the day. He protected Biggs who in turn protected Luke and the rest is history.
                As for the general game, I would love to see this repair droid have more possibilities for competitive use. The best fix for it, in my opinion, would be to eliminate the chance. In a reprint of D8 I would make him read "Your Action Bar receives the Repair Action" and include a new rule card. The action would simply be to discard one facedown damage card. This would put D8 on the same playing field as R2-D2: if you fulfill a parameter, you get the reward. And the comparative cost of the droids would match that of the Hull Upgrade to the Shield Upgrade. It would also be nice if the droid were generic, that way multiple ships in a squad could have repair abilities.

R5-K6 - 2 Points
                K6 is another droid that is currently underpowered in the meta game. At the time of Wave 1, K6 was a great droid and his ability made sense. If you wanted to fire your torpedoes effectively you had to get a target lock, not use it, then pair it next round with a focus for a great shot. However, if you took K6 then you had a 38% chance of using your target lock and still keeping it for next round. But this ability was overshadowed when the B-wing brought the Fire Control system, which provides a 100% chance of keeping your target lock. Since the FCS and K6 cost the same amount of points we know that the droid is now underpowered in the game.
                So what kind of fix does K6 need? We could just make it simple by eliminating the chance and making K6 have a guaranteed target lock. However, this just makes him the FCS for astromechs and creates a boring repeat ability. We need something to give K6 some individualism and make it tempting to pick an astromech slot over a system. My suggestion is to keep the chance the same but make the reward bigger. Have a reprint card read: "When you acquire a target lock on an enemy ship, roll 1 defense die. On an evade result acquire a second target lock. That target lock may be used this round." Essentially, K6 would now give a 38% chance of getting two target locks and thus allow you to fire a modified torpedo right then.
                Not only would this bring K6 back up to playing level, it would add some spice to the dull ordnance play in the meta. And it would provide some iconic application. In the Star Wars universe K6 is Garven Dreis's droid. You might know him as Red Leader from the Battle of the First Death Star. However K6's ability doesn't really make sense when applied to this battle. Garven locked onto the port vent of the Death Star but after he fired he didn't need to reacquire another target lock. If K6's ability were to provide a second, modifying target lock then it would add to the lore. Garven would've had the perfect shot and yet he still missed. While on the other hand a farm boy in tune with the force made the shot with a Deadeye focus. Moreover, Garven's ability in game means that you never want to take a target lock. With the help of a new K6, Garven could take 2 locks to use in the coming rounds then take focuses for his next actions to help his allies.

R5-P9 - 3 Points
                P9 is a decent droid and pretty straight forward. If you have a focus left over during the end phase he can turn it into a shield recharge. He works really well when paired with allies like Kyle or Garven who can help make sure he has that leftover focus. The only thing I will say about this droid is that I wish he was generic rather than unique. A squad of Rookies each with a P9 could help bring X-wings back to the competitive table.

R7 Astromech - 2 Points
                The R7 astromech is the last generic droid on our list. In the lore the R7 was actually designed by Alliance engineers specifically for the E-wings. And in the Miniatures world the droid does work well with the E-wing, especially when paired with a FCS. It is also a great combo when paired with Tarn Mison's ability, allowing him to use his free target lock for defense.
                But the main reason why I love the R7 unit is because it adds to the Target Lock Action. The reroll of a target lock gives you around the same benefit offensively as a focus. Because of this most people only take a lock when they need to fire ordnance or when they don't have a shot and want to save it for next round. But R7 adds a fun change. A defensive target lock can be use in 360 degrees, even if your ship can only fire forward. And a ship with R7 can take a target lock for offense, then switch it over for defense if they get outmaneuvered.
                Another great twist is the application of the rules on dice modification. They state that when a defender modifies the dice of the attacker it happens before the attacker's own modification. This means that you can use R7 to interrupt an attack and waste an opponent's attack modification points. Suppose you get shot by a HLC and the attacker gets 2 hits. If he has a target lock, Lone Wolf, or Predator reroll then he has a good chance of boosting that attack. But before he can modify you can spend your defense target lock and reroll all of his dice. On average your reroll will produce a dice result that is the same as, or worse, than the original. And dice can only be rerolled once so now the attacker has no way of improving his result. Just like with R4, you have wasted enemy upgrades dedicated to offense. And since R7 is generic that means you can take a whole squad of 'em.

R7-T1 - 3 Points
                His nickname is RT in the books yet most players refer to him as the Boost Droid. If used correctly he can provide you an engine boost and a target lock every turn. However, his ability does require a hard set of parameters to be filled.
                Here's the secret to using RT: he is a pilot skill grab. If you place him on a high PS ship and your enemy has lower pilots, he will terrorize them. But if you are against a higher pilot ship then RT won't help you. This is because the ability can only be activated after you move. If you are the highest skill pilot on the board then you can fly into enemy arcs and boost in for the kill or boost out of their shot. Either way you are safe because you know that the enemy ships have already moved. Logically, it is the exact opposite when your ship has the lower pilot skill. You can boost in for the kill but the enemy will move away and you can try to boost to safely but the enemy will follow right behind you.
                So if you take RT be sure to back him up with high pilot skill. He works really well on Luke, Wedge, or Corran with Veteran Instincts. Horton is another good pilot to pair with because the droid gives the slow Y-wing a big advancement in maneuverability. However, be extra careful with this combo because Horton can't take VI and will be vulnerable to enemy aces. If you do want to use Horton, or any lower pilot skill ship, then run RT alongside with Intelligence Agents. That way you can know enemy movements and can better judge when to use your boost action. With any of the aces you pick also consider giving them a torpedo. It is really easy to take a target lock, boost out from an enemy attack, and save the lock for another round. Have fun experimenting with this unique ability.

                And there you have it. 12 different droids but only 1 slot per ship. Which of these droids will you pick? Which is your favorite? Let me know in the comments. I hope you enjoyed this analysis and learned something new. Have fun shopping for droids!

Monday, August 10, 2015

Well, C'mon Red, Let's Go! - Deciding Which Astromech Your Rebel Pilot Should Take, Part 1

                Some of the most memorable and fun moments of the Star Wars universe don't come from the main characters but rather from side-kick droids. The archetype of this is our best friend R2-D2. So you can imagine how exuberant I was when I learned that Astromechs were an integral part of the X-wing Miniature game. Right from the start you can open up your core set and fly Luke Skywalker with Artoo!
                But when it comes to choosing droids for squad lists in the game you must be very judicial. Most of them are unique and a few are actually underpowered in the current meta. Moreover, you are limited in squad points and only having one droid slot per ship. This article is the first in which I will give commentary on which droid a player should take as well as discuss ways that underpowered droids could possibly be fixed. Let's start with the R2, R3, and R4 Series.

R2 Astromech - 1 Point
                I would consider this little guy to be the staple droid of the Rebel fleet and not just because he comes first alphabetically. The R2 unit's ability to make all 1 and 2 speed moves green is a safe and reliable choice. And since it is a generic droid, you can equip as many of them as you like. It's a wonderful ability that gives you more freedom of movement and allows you to stay unpredictable when shedding stress. Honestly, if you don't know which droid to take you should fall back on this one.
                Each of the three ships with astromech slots receives a great benefit when paired with an R2 unit. Both the X and the E receive 4 new green moves and combine well with self-stress talents. While on the E it can also be paired with Advanced Sensors. For example, Corran Horn could take an action before moving, Push the Limit for a second action, then do 1 of 9 green moves to remove the stress. However, where it shines the most is on the Y-wing becuase it raises the number of green moves from 2 to 8! This allows the option of creating a jousting Y. Even though Rebel Warthogs can't gain action economy from the R4 Agro, they can recieve greater jousting power using the R2 Astromech.

R2-D2 - 4 Points
                Everybody knows R2-D2 so I'm not going to spend much time writing about him. To learn about how he works in-game just take him out for a test run and I can promise that you will fall in love with him. The only thing to keep in mind when using him is that you need to fly unpredictably. Since your opponent is going to expect you to do green moves you need to learn how to feign. Nothing is more exhilarating than when your opponent thinks you will do a green but you fly off on a wild white move. More often than not the enemy ships will be out of position which allows you to make an unpressured green move next turn while they recover. And also, don't put him on a Y-wing, trust me.

R2-D6 - 1 Point
                At first glance this droid looks like it gives your pilot an elite talent. However, we need to remember that the cost of an upgrade card must include the use of its slot. What R2-D6 truly does is replace your astromech slot with an elite talent slot, similar to how the E2 card replaces the B-wing's mod slot for a crew. The only reason to use this droid is if your squad requires a ship with the astromech slot that isn't using it and needs an EPT. One fun application of this is on middle pilot skill generics. Consider putting Deadeye on a Grey Squad pilot with torpedoes or possibly combine a Red Squad pilot with Lightning reflexes. One of the most famous combos is a PS 8 Garven with Veteran Instincts. Bottom line: remember that whichever EPT you choose is costing you one extra point.

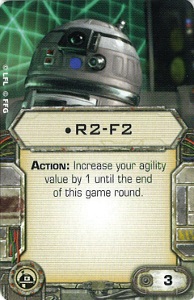
R2-F2 - 3 Points
                A lot of players incorrectly believe that this droid is underpowered but that is actually because they use it wrong. In theory it always sounds better to get an extra dice, right? This isn't always true because dice modification actions are very powerful. Let's use the example of an X-wing. Statistically, 3 unmodified defense dice give you less evade results than 2 defense dice with a focus token. The current meta states that if you want to take this droid then you also need to have good action economy to get a focus, such as Biggs with F2 and the Experimental Interface.
                However, when we look back at the statistics we find that there is another application. The dice comparison I just stated before only applies when you are facing an enemy ship one to one. What if your ship is being attacked by multiple enemies? Let's use the minimum example of two enemy ships. 6 unmodified defense dice (3 dice x 2 attacks) roll an average of 2.25 evades. On the other hand, 4 defense dice (2 dice x 2 attacks) with 2 having access to a focus only roll an average of 2 evades. This is because once the focus token is used it is gone and the rest of your rolls are unmodified.
                That is why F2 is included in the core set. The X-wing doesn't have a barrel roll and can't move away when it makes a bad maneuver. This can be really devastating in a Beginner game when both Ties outmaneuver the X and have clean shots. But if the X-wing has F2 then it can mitigate the damage by boosting both its average and extreme evade results. And this effect is even more powerful when playing a Standard game. For each additional attacker, the 3 unmodified dice get proportionally more powerful. If Biggs is facing a squad of 4 attackers, he will get an average of 4.5 evades with F2 and only 3.5 with a plain focus.
                What about the E-wing? The math shows that a boost from 3 to 4 defense dice doesn't justify the loss of the focus until you are being shot at by at least 3 attackers. And honestly, if your E-wing is getting shot at by 3 enemies in one turn, you're flying it wrong. So don't use F2 on the E-wing. As for the Y-wing, that is a complete opposite story. Using a focus token on 1 defense dice is actually a big waste and this is reflected in the numbers. When you boost from 1 to 2 defense dice, you always receive an increase in evade averages, despite the numbers of attackers. So if you want to fly a Y-wing geared for defense then this is the droid for you.

R3-A2 - 2 Points
                Nicknamed the Stress Bot, this courageous guy is probably one of the most popular droids. He works quite simply: if you can shoot an enemy in your forward arc then you can also stress him. The ability gives yourself a stress as well but it is worth it because it is a guaranteed result. If you take Flechette torpedoes then they are useless against large ships and if you take a Tactician then you have to fly in precision to get range 2. But A2 isn't limited by any of that and always stresses whichever ship you point him at. All you need to do is make sure that you properly deal with the stress you are receiving.
                I wouldn't put A2 on an E-wing since the ship is reliant on actions. But this is a good choice for X's and Y's. The X-wing has enough low green maneuvers that it can slow play an enemy, re-stressing it for multiple turns. Equip Luke with A2, Veteran Instincts, and an Engine Boost and he can stress and hunt most enemy Ace pilots. Or you can consider pairing this droid with Hobbie or Porkins. Both of them are efficient at removing stress from themselves and so excel at using A2. And he is also great when paired with a Y-wing: an Ion Warthog can lock down a lane, ionizing and stressing anything that gets in his path.

R4-D6 - 1 Point
                This droid is hilariously awesome but, sadly, he do not see much competitive use. This is because he is the "worst case scenario" droid. I know for me, I don't like to admit that I can get stuck in horrible situations. I mean, I'm too good of flyer, right? Alas, that is human nature and it isn't easy for people to say they make mistakes and that they could use a safety net. But when we realize this, we find that R4-D6 becomes one of the BEST droids in the game.
                Here's the break down. In X-wing Miniatures, the gameplay is favored towards offense. This promotes a game style that is always progressing towards the endgame and rarely gets stuck. When you look at the big picture, powerful attacks are far cheaper than powerful defenses. Think about it. The Predator upgrade costs 3 points and allows you to reroll up to two attack dice. Flight Instructor, its counterpart card, costs 4 points and only allows 1 defensive reroll. Another example is Plasma Torpedoes vs the Shield Upgrade, both of which are 4 points. The former can do up to 5 damage to shields while the latter only adds 1 shield for defense.
                But a bright, shining counterexample of this rule is R4-D6. He costs a mere 1 point, he doesn't take up your action, and there is no difficult circumstances to meet for his ability to work. Any hits you take over a base of 2 get converted into stress. Just take a moment to really apply this ability and you will see that R4 becomes the "Anti-HLC" droid. Consider an Outrider with Predator and an HLC. When it faces R4 it is literally wasting 15 points because no matter what it does it can't give more than 2 hits! Another application to think about is when R4 is facing Soontir or Whisper. No matter what these pilots do, and no matter what range, they can do no more than 2 damage to your ship each turn.
                A Y-wing with a Hull upgrade and R4 requires 5 enemy hits before it is finally killed. This probably isn't a viable strategy to counter swarms but it is amazing against 2 ship builds. Have your Y-wing fly point to protect the rest of your squad while you chase a running large ship. Or have him go up against the runner 1-to-1 while your other ships focus down the second ship hiding on the sidelines. If you equip the Y with a Twin Laser Turret he becomes a large ship hunter that can trade 2 damage for 2 every turn. R4 also works well with E-wings and X-wings. Suppose you have a squad where you want an arc dodging E or X but you just don't have enough points left over for R2-D2. Well now you can take R4 and he can be a big help. He won't recharge your shields but he can make sure an enemy doesn't damage your hull if you make a wrong move and your dice fail you. So don't be scared to take R4. It is wise, not foolish, to admit that you can't avoid all the nasty battle scenarios out there. He might just be the hinge on which you survive and win a match.

                That is the first half of the Astromechs. Stay tuned for the second half where I will cover the R5 and the R7 series. Thanks for reading! Comments are appreciated and encouraged.