Some of the most memorable and fun moments of the Star Wars universe don't come from the main characters but rather from side-kick droids. The archetype of this is our best friend R2-D2. So you can imagine how exuberant I was when I learned that Astromechs were an integral part of the X-wing Miniature game. Right from the start you can open up your core set and fly Luke Skywalker with Artoo!
But when it comes to choosing droids for squad lists in the game you must be very judicial. Most of them are unique and a few are actually underpowered in the current meta. Moreover, you are limited in squad points and only having one droid slot per ship. This article is the first in which I will give commentary on which droid a player should take as well as discuss ways that underpowered droids could possibly be fixed. Let's start with the R2, R3, and R4 Series.
R2 Astromech - 1 Point

 Each of the three ships with astromech slots receives a great benefit when paired with an R2 unit. Both the X and the E receive 4 new green moves and combine well with self-stress talents. While on the E it can also be paired with Advanced Sensors. For example, Corran Horn could take an action before moving, Push the Limit for a second action, then do 1 of 9 green moves to remove the stress. However, where it shines the most is on the Y-wing becuase it raises the number of green moves from 2 to 8! This allows the option of creating a jousting Y. Even though Rebel Warthogs can't gain action economy from the R4 Agro, they can recieve greater jousting power using the R2 Astromech.
R2-D2 - 4 Points
Everybody knows R2-D2 so I'm not going to spend much time writing about him. To learn about how he works in-game just take him out for a test run and I can promise that you will fall in love with him. The only thing to keep in mind when using him is that you need to fly unpredictably. Since your opponent is going to expect you to do green moves you need to learn how to feign. Nothing is more exhilarating than when your opponent thinks you will do a green but you fly off on a wild white move. More often than not the enemy ships will be out of position which allows you to make an unpressured green move next turn while they recover. And also, don't put him on a Y-wing, trust me.

R2-D6 - 1 Point
At first glance this droid looks like it gives your pilot an elite talent. However, we need to remember that the cost of an upgrade card must include the use of its slot. What R2-D6 truly does is replace your astromech slot with an elite talent slot, similar to how the E2 card replaces the B-wing's mod slot for a crew. The only reason to use this droid is if your squad requires a ship with the astromech slot that isn't using it and needs an EPT. One fun application of this is on middle pilot skill generics. Consider putting Deadeye on a Grey Squad pilot with torpedoes or possibly combine a Red Squad pilot with Lightning reflexes. One of the most famous combos is a PS 8 Garven with Veteran Instincts. Bottom line: remember that whichever EPT you choose is costing you one extra point.
R2-F2 - 3 Points
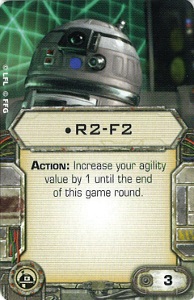 A lot of players incorrectly believe that this droid is underpowered but that is actually because they use it wrong. In theory it always sounds better to get an extra dice, right? This isn't always true because dice modification actions are very powerful. Let's use the example of an X-wing. Statistically, 3 unmodified defense dice give you less evade results than 2 defense dice with a focus token. The current meta states that if you want to take this droid then you also need to have good action economy to get a focus, such as Biggs with F2 and the Experimental Interface.
However, when we look back at the statistics we find that there is another application. The dice comparison I just stated before only applies when you are facing an enemy ship one to one. What if your ship is being attacked by multiple enemies? Let's use the minimum example of two enemy ships. 6 unmodified defense dice (3 dice x 2 attacks) roll an average of 2.25 evades. On the other hand, 4 defense dice (2 dice x 2 attacks) with 2 having access to a focus only roll an average of 2 evades. This is because once the focus token is used it is gone and the rest of your rolls are unmodified.
That is why F2 is included in the core set. The X-wing doesn't have a barrel roll and can't move away when it makes a bad maneuver. This can be really devastating in a Beginner game when both Ties outmaneuver the X and have clean shots. But if the X-wing has F2 then it can mitigate the damage by boosting both its average and extreme evade results. And this effect is even more powerful when playing a Standard game. For each additional attacker, the 3 unmodified dice get proportionally more powerful. If Biggs is facing a squad of 4 attackers, he will get an average of 4.5 evades with F2 and only 3.5 with a plain focus.
What about the E-wing? The math shows that a boost from 3 to 4 defense dice doesn't justify the loss of the focus until you are being shot at by at least 3 attackers. And honestly, if your E-wing is getting shot at by 3 enemies in one turn, you're flying it wrong. So don't use F2 on the E-wing. As for the Y-wing, that is a complete opposite story. Using a focus token on 1 defense dice is actually a big waste and this is reflected in the numbers. When you boost from 1 to 2 defense dice, you always receive an increase in evade averages, despite the numbers of attackers. So if you want to fly a Y-wing geared for defense then this is the droid for you.
R3-A2 - 2 Points
 Nicknamed the Stress Bot, this courageous guy is probably one of the most popular droids. He works quite simply: if you can shoot an enemy in your forward arc then you can also stress him. The ability gives yourself a stress as well but it is worth it because it is a guaranteed result. If you take Flechette torpedoes then they are useless against large ships and if you take a Tactician then you have to fly in precision to get range 2. But A2 isn't limited by any of that and always stresses whichever ship you point him at. All you need to do is make sure that you properly deal with the stress you are receiving.
I wouldn't put A2 on an E-wing since the ship is reliant on actions. But this is a good choice for X's and Y's. The X-wing has enough low green maneuvers that it can slow play an enemy, re-stressing it for multiple turns. Equip Luke with A2, Veteran Instincts, and an Engine Boost and he can stress and hunt most enemy Ace pilots. Or you can consider pairing this droid with Hobbie or Porkins. Both of them are efficient at removing stress from themselves and so excel at using A2. And he is also great when paired with a Y-wing: an Ion Warthog can lock down a lane, ionizing and stressing anything that gets in his path.
R4-D6 - 1 Point
 This droid is hilariously awesome but, sadly, he do not see much competitive use. This is because he is the "worst case scenario" droid. I know for me, I don't like to admit that I can get stuck in horrible situations. I mean, I'm too good of flyer, right? Alas, that is human nature and it isn't easy for people to say they make mistakes and that they could use a safety net. But when we realize this, we find that R4-D6 becomes one of the BEST droids in the game.
Here's the break down. In X-wing Miniatures, the gameplay is favored towards offense. This promotes a game style that is always progressing towards the endgame and rarely gets stuck. When you look at the big picture, powerful attacks are far cheaper than powerful defenses. Think about it. The Predator upgrade costs 3 points and allows you to reroll up to two attack dice. Flight Instructor, its counterpart card, costs 4 points and only allows 1 defensive reroll. Another example is Plasma Torpedoes vs the Shield Upgrade, both of which are 4 points. The former can do up to 5 damage to shields while the latter only adds 1 shield for defense.
But a bright, shining counterexample of this rule is R4-D6. He costs a mere 1 point, he doesn't take up your action, and there is no difficult circumstances to meet for his ability to work. Any hits you take over a base of 2 get converted into stress. Just take a moment to really apply this ability and you will see that R4 becomes the "Anti-HLC" droid. Consider an Outrider with Predator and an HLC. When it faces R4 it is literally wasting 15 points because no matter what it does it can't give more than 2 hits! Another application to think about is when R4 is facing Soontir or Whisper. No matter what these pilots do, and no matter what range, they can do no more than 2 damage to your ship each turn.
A Y-wing with a Hull upgrade and R4 requires 5 enemy hits before it is finally killed. This probably isn't a viable strategy to counter swarms but it is amazing against 2 ship builds. Have your Y-wing fly point to protect the rest of your squad while you chase a running large ship. Or have him go up against the runner 1-to-1 while your other ships focus down the second ship hiding on the sidelines. If you equip the Y with a Twin Laser Turret he becomes a large ship hunter that can trade 2 damage for 2 every turn. R4 also works well with E-wings and X-wings. Suppose you have a squad where you want an arc dodging E or X but you just don't have enough points left over for R2-D2. Well now you can take R4 and he can be a big help. He won't recharge your shields but he can make sure an enemy doesn't damage your hull if you make a wrong move and your dice fail you. So don't be scared to take R4. It is wise, not foolish, to admit that you can't avoid all the nasty battle scenarios out there. He might just be the hinge on which you survive and win a match.
That is the first half of the Astromechs. Stay tuned for the second half where I will cover the R5 and the R7 series. Thanks for reading! Comments are appreciated and encouraged.
This brought up a lot of good points I hadn't thought about and Astromechs are absolutely one of my favorite upgrades. This will definitely give me some more versatility in my builds now.
ReplyDeleteGlad I could bring up some new ideas. I really like running astromechs as well and I am excited for all the new salvaged droids in Wave 8. Thanks for reading!
DeleteWhen talking about R4-D6, you mention Navigator as the counterpoint to Predator. It's Flight Instructor that lets you reroll a defense die, not Navigator.
ReplyDeleteThanks for the catch. I always get the two of those confused! Its corrected now in the text.
Delete