In last week's article we talked about how Wave 7 mixed with bombing mechanics will create numerous new bombing techniques. This week I wanted to dive a bit deeper into viable applications of the new advanced bombers: the Punisher and the K-wing. When it comes to X-wing Miniatures, factions and ships have always had their own strengths and weaknesses as well as unique upgrade capabilities. So it is no surprise to us that these two ships act completely different while doing the same job. Although there are multiple upgrades slots on each ship I want to focus on the things that make each one unique and how we can best apply them.
Before we dive in, I do want to share one thing that has been on my mind. Ever since Wave 7 was announced I have heard many people ask: why do these bombers have small bases? Well, all we had to do was trust FFG and wait for the announcement of Wave 8. When we see that the monstrous Ghost is considered a large-base ship it is easy to imagine the Punisher or K-wing as small. But there is more to it than that. FFG really takes all things into consideration when balancing their game. A small base bomber receives a benefit when it comes to traveling through asteroids. And that is right where these bombers belong. You want to have then weave through obstacles, block lanes, and trap enemy ships with their ordnance. On the flip side though, a small base means these ships are vulnerable to ionization, especially with their low agility. The power of these bombers come from their amazing speed and it makes sense that there is a way to counter this. So if you are planning on facing one, consider taking an Ion Y-wing, AIS B-wing, or Ion Headhunter in your squad compositions. Just something to think about.
K-wing
Ok, the first and biggest new thing we get with this wave of bombers is the SLAM action. In the lore the Sub-Light Acceleration Motor made the K-wing the fastest ship in real-space. Thusly it was perfect for strafing runs on capital ships. However, it wasn't as good at turning and this is reflected in the K-wing's dial. When you take this action it does prevent you from shooting but, honesty, we don't care. A normal bomber on a strafing run would flee and therefore not shoot anyways. And the SLAM gives us so much versatility. Since the action is considered a maneuver it means you can choose to drop your bomb before you SLAM instead of before you activate. You can also equip the Advanced SLAM upgrade which gives you a second action, as long as you didn't overlap anything. This means you can move, SLAM, and then drop a mine. Just like in the extended universe you can have your K-wing cross ridiculous amounts of space in order to get your bombs in the right places.
The second unique thing about the K-wing is that it has the crew upgrade. Here's a few crew members that I found to be intriguing. First off is the Bombardier. It's cheap and simple. And not only does it double bombing distance, it doubles the options you have to pick when choosing to drop. Not everyone can be as good as Emon, but Emon also can't appear more than once in your squad. Just saying.
The next crew member that I really like is the Intelligence Agent. A K-wing with an IA can make sure you get the most effectiveness out of your SLAM action. Even better, it can help you lay bombs with more precision. Normally it is impossible to hit high PS ships with bombs but with an IA you actually have a chance, especially if the enemy has few options for movement actions. So try taking one and see how fun the synergy can be.
The other two crew members I want you to consider are ones that don't really see much love. The first is the Saboteur. People don't normally picking him because he takes up your crew slot, costs 2 points, and only works 50% of the time. However, here is a combination where he is quite viable. Instead of taking Proton Bombs and Extra Munitions for 7 points, consider taking Seismic Charges, Extra Munitions, and a Saboteur for 6 points. You save yourself a point plus the crew is technically free with your savings from extra munitions. Even after you have spent all of your ordnance, your Saboteur can continue to work throughout the rest of the game. This means that your K-wing won't drop from super deadly to boring when your run out of bombs. You can give facedown damage cards to enemy ships then spend the new few turns dogging, shooting, and sabotaging them. And this build terrorizes unshielded, low skill pilots. Namely Tie Swarms. Why not try it out?
The final crew I want to talk about is Leebo. I know, you're shaking your head at this one but hear me out. This crew was originally made to be a cheap engine upgrade: you save 2 points but you have to pay the price in ionization. Who wants to waste their crew slot to ionize themselves? He works OK on Large base ships but he is useless if the enemy has ion attacks. But here is a crafty application. The SLAM action requires you to keep the same speed number on your movement. So if you pick the wrong movement, a SLAM could actually make you overshoot your target. Leebo will allow you do to a 2 or 3 speed move and then do a 1 speed boost, giving you better precision in your movement. You then get ionized but this is where the trap has been set! Enemy ships will see you in your plight and unmercifully swarm in for the kill. And they don't need to worry about you dropping a bomb on them because ionized ships don't get to pick a move, right? Well, after you perform an ionized move you still get to take an action. And the SLAM action is considered a maneuver. This allows the K-wing to make an ionized move, drop a bomb, and SLAM away at speed 1! And just like with Daredevil, you can still do your SLAM action even if you bump. So if your K-wing gets surrounded on all sides you can still drop a bomb and bump with your SLAM. You might take a hit yourself but you'll get everyone else too! All it takes is for you to sucker your enemy once and then he'll be wary to come into range 1 again. This gives you the freedom to boost whenever you want and a K-wing that boosts can still shoot with its turret.
The Tie Punisher
Now onto the second half of our spotlight. The first thing the Punisher brings to the table is the boost action. Just like with the SLAM, this action is crucial in the early game to get into needed bombing positions. And when it comes to ionization the boost can also be used to prevent the Punisher from becoming trapped. Probably the most interesting fact of the boost here is that it allows you to take the Autothrusters upgrade.
But is this the modification you should take? If you want to get the most out of your one evade dice then I would say go for it. You're going to be out of arcs a lot of the time on your bombing runs so having autothrusters will make sure that any attack is reduced by one. And with it you can save your actions for boosts or mines. But let's not discount other mods. The Punisher really benefits from the upgrade included in its expansion: the Mark 2 engine. This raises the ship's green moves from 4 to 8. This really helps you get to the right places on the map, especially when that 2 turn is very red.
The second unique thing about the Punisher is that it has the System upgrade. This is where the fun begins. Ever since Wave 3, the System slot has always set apart the humdrum ships from the sophisticated ones. So naturally the new, advanced Imperial Bomber has been given this luxurious upgrade slot. The Punisher expansion itself brings no new systems to the table. But that is ok because there are still lots of others to choose from.
Let's first look at the Fire-Control System and the Accuracy Corrector. Take one of these if you are looking for a bomber that can drop lots of ordnance but also hit hard with its main guns. The AC guarantees that you will never miss with your 2 attack dice but it is expensive. The FCS is cheaper yet is limited because you have to keep shooting at the same ship. And this can be hard to do when you are flying random strafing vectors around enemy squads. However, it is very strong when facing a 2-ship build. And it is a must-have if you are going to pack torpedoes, as well as bombs, on your generic pilot.
Another fun system is the Enhanced scopes. In my bomb strategy update I talked about how an advanced bomber needs to have a mid-range pilot skill in order to target both low and high pilot skill ships. But when you equip your Punisher with ES then we have a whole different story. This means that your bomber will move before every other ship and therefore you can land mines on any pilot. Not only is this super fun, it actually saves you a couple squad points. So try it out!
The one system that I wouldn't take is the Sensor Jammer. Don't get me wrong, it is a good upgrade and is downright nasty in the right setup. But in this case I would take Autothrusters over the Sensor Jammer.
And this leaves us the best for last, the Advanced Sensors. This card really puts the shine on the Punisher's bombing ability. If you are unsure of which system to take, start out with this one. You can boost before you reveal a maneuver and thus have better accuracy when laying bombs on low PS ships. Or you could drop a mine before you move and really surprise an opponent. Advanced sensors also allows you to bump on purpose. Consider picking a move that will launch you directly at a higher PS ship. Then lay a mine, reveal your move, and bump the enemy. Not only do you still get your ordnance out, you are now in a spot where the enemy ship will not be able to hit you. Either the ship moves 1 forward and can't attack you, moves to the side and doesn't get a shot, or else K-turns and lands right on top of your mine. And there are countless other applications. Because it lets you be unpredictable you are free to do what you want and your opponent will have a difficult time trying to counter your moves.
And there you have it. We've looked at several possible combinations for these bombers, some viable and some just really fun. Be sure to try out the ones that intrigue you when you are able to get your hands on Wave 7. Practice hard on those strafing runs and fly casual!
Afterwards:
5 points to Gryffindor for any player that uses an Advanced SLAM to place a Conner Net in front of a large base ship and yells: "Grand SLAM, you pancake!" Then be a good sport and treat them to Denny's after the game. lol
Monday, August 24, 2015

Monday, August 17, 2015
A Look At The Next Generation of Bombing - A Poor Grey Pilot Strategy Update
Three Variants of Bombers
The old meta really only had one type of bomber: if your ship had a bomb
slot then it drop a bomb. Wave 7 is going to
revolutionize the strategy of bombing with ship that have 2 bomb slots, as well as the Extra Munitions upgrade.
These changes will expand the Bomber role from one variant to three.
The
first of these is the Basic Bomber. This variant essentially has one bomb slot and
so can only do basic bombing techniques. The two ships here are: the Aggressor and the
un-titled Firespray. If you see either of these with a bomb, you can
rest assured that it can do no more than a one-and-done drop.
The
second variant is the Standard bomber. These ships have one bomb slot as
well as a torpedo for extra munitions. This means that most bombers on the table will be threatening for more than one round. This kind of bomber
includes: the Y-wing, Tie Bomber, Slave 1, and Decimator. While these ships
have access to multiple bombs, they are only allowed to have one type. So if you
are going to field one make sure that you adequately pick the right bomb for
your squad's needs. If you are facing one ingame, then you only have
to worry about one type of bomb. Try to find out your enemy's
bombing strategy and proceed with the correct counter.
The
third and final variant is the Advanced Bomber. These ships can equip
more than one type of bomb and have access to multiple bombing techniques. This variant includes: the Andrasta,
K-wing, and Tie Punisher. The latter two have two bomb slots and a torpedo slot, and therefore can take two different types of bombs and a total of 4. As for the Andrasta, it can't take extra munitions but it can give you up to three different types of bombs.
Bombs vs Mines
The upgrade from basic to standard is an obvious advantage: getting more bombs at a discount is awesome. However, transitioning from one type of bomb to multiple is a more suble advantage. Yes, you have more options for strategy, but the main advantage comes from the diffrences between the two categories of bombs, bombs and mines.
Bombs in X-wing are characterized as such: they don't require an action to use, are released
from your ship before you reveal a maneuver, and always explode at the end of the activation phase. A mine's defining characteristics are the exact opposite of bombs: they require an
action to drop, are used after you make your maneuver, and don't explode until a
ship moves over them.
The mechanics of bombs and mines are different, and so it makes sense that their applications
are different as well. Bombs explode during the same turn you drop them, so
you want them to do damage right then. They are most effective when placed next to
ships that have already activated, and therefore are most easily used against lower pilot skills. Mines, on the other hand, have two applicable uses. The first is to place them to lock down a lane or block an escape route, thus giving you more control over the board. The
second strategy is placing mines ontop of ships unmoved ships. Since mines explode when a ship
touches it, it doesn't matter whether or not the enemy has moved. Because of this, mines are more easily used against high pilot
ships.
Application of the Advanced Bomber
If you want your bomber to target high pilot skill
ships, then you should pick low skill pilots and arm them with mines. To target low skill pilots, you should take an ace bomber and load him
with bombs. Both of these builds are strong against the ships they hunt.
But it also creates a weakness in squad building. If you
have a low PS bomber with conner nets, it won't do so well against an enemy swarm. Conversely, if you have an ace bomber with proton bombs, he is not going to do much against a 2-ship large-base build. We don't want to leave a gap like that in squad
strategy. One answer is to fly multiple bombers, one
with bombs and the other with mines.
However another option has been presented with the new Advanced Bomber role. This type of
bomber can to save you squad points because it can equip both a bomb and a
mine. That way you are able to easily switch your bombing strategies based off
of the different squads you meet in tournaments.
Choosing Your Pilot Skill
First off, don't pick low skill pilots. They will be great against aces but
will be vulnerable to other generics. On the other hand, most ace bomber pilots are a good choice because they generally have lower pilot skills than other
named pilots. However, if you are going to spend the points for an ace make
sure you are getting a good bomber ability, such as Emon or Deathrain.
If you want to keep your advanced bomber on the cheaper side, then you can consider
the option of taking a middle-skilled generic pilot. Normally these pilots are overcosted but, in this situation, their skill level is a
perfect fit. They are high enough to take on generic swarms but also
low enough to terrorize aces. A Guardian K-wing, Black Eight
Punisher, or Mandalorian Firespray can be devastating to every enemy ship on the table.
I hope you are as excited as I am for the new wave
of bombers to come out. Keep practicing and fly casual.
Punisher w/ Black Eight - 35 Points
Seismic
Charges
Cluster Mines
Extra
Munitions
Twin
Ion Engine Mk II
Advanced
Sensors
K-wing w/ Guardian - 36 Points
Seismic
Charges
Conner
Net
Extra
Munitions
Bombardier
Advanced
Slam
Firespray w/ Mandalorian - 44 Points
Andrasta
Title
2
Proximity Mines
Seismic
Charges
Inertial Dampeners
Friday, August 14, 2015
I've Got A Problem Here...Deciding Which Astromech Your Rebel Pilot Should Take, Part 2
As promised, here is the second half of the Astromechs in the X-wing Miniatures game. So let's jump right in and discuss the R5 and R7 series.
R5 Astromech - 1 Point
 The R5 is our second generic droid in the game and a great one at that. His ability of turning ship-based criticals facedown can be a real game changer. An R5 unit may be the difference between dying right then or staying around just a little longer to dish some back at the enemy. There are 33 cards in the damage deck and 25 of them have the Ship title. Of those only 6 aren't fixable by R5 because they take immediate effect. This means that equipping an R5 unit gives you a 58% chance of not suffering the effects of a critical damage.
Since R5's ability only affects hull points you don't want to take him on an E-wing. On the flip side, however, this doesn't make the Y-wing a great choice. The Y has such a low damage mitigation that the enemy can rip through your 5 hull before R5 even has a chance to take effect. It would benefit you more to give your Y-wing a boost in movement or agility.
R5-D8 - 3 Points
 D8 is the game's repair droid and works really well against two Ties in a Beginner game. However, once you move onto Standard games D8 becomes vastly underpowered. There are so many guns in a 100 point match that actions really become pivotal. So it is not cost effective to give up your action and roll a chance die to repair. If you want a repair ability then it is much more cost effective to pay for R2-D2. For just 1 more point you get a guaranteed shield recharge and it doesn't cost your action.
Honestly, the only viable application I have seen of D8 in the Standard game is when you fly him with Jek Porkins. This pilot can remove stress automatically but there is a chance he will damage his own ship. If that happens then we have a unique opportunity: using D8 isn't really isn't a waste of an action because you normally wouldn't have that action in the first place! And if Jek doesn't damage his own ship he is free to use that action for a focus. The combo is powerful because the numbers are in your favor. Jek only has a 38% chance of hurting his X-wing but if he does then D8 has a 63% chance of repairing the damage. If you do repair then you don't get the free action but the stress is still gone and the X-wing isn't limited in its movement next turn. If Jek receives a damage and D8 fails then it kinda stinks but there is only a 14% chance of this happening. So if you love riding the edge of disaster to get better performance then this is the combo for you.
Not only is this paring effective, it is also iconic. D8 is the droid that Porkins has in the movies and comics. In dogfights before Epsiode 4, Jek was an amazing pilot that pulled risky stunts to beat the enemy and had D8 to back him up. However his luck ran out during the Battle of the First Death Star. In a strafing run with Biggs, Jek's ship was pelted by shrapnel from the surface. Jek tried to keep control of his stressed-out ship but in the process he damaged his own engines. D8 wasn't able to fix the problem in time and the sluggish X-wing was caught by turbo laser fire. But even in death he still helped save the day. He protected Biggs who in turn protected Luke and the rest is history.
As for the general game, I would love to see this repair droid have more possibilities for competitive use. The best fix for it, in my opinion, would be to eliminate the chance. In a reprint of D8 I would make him read "Your Action Bar receives the Repair Action" and include a new rule card. The action would simply be to discard one facedown damage card. This would put D8 on the same playing field as R2-D2: if you fulfill a parameter, you get the reward. And the comparative cost of the droids would match that of the Hull Upgrade to the Shield Upgrade. It would also be nice if the droid were generic, that way multiple ships in a squad could have repair abilities.
R5-K6 - 2 Points
 K6 is another droid that is currently underpowered in the meta game. At the time of Wave 1, K6 was a great droid and his ability made sense. If you wanted to fire your torpedoes effectively you had to get a target lock, not use it, then pair it next round with a focus for a great shot. However, if you took K6 then you had a 38% chance of using your target lock and still keeping it for next round. But this ability was overshadowed when the B-wing brought the Fire Control system, which provides a 100% chance of keeping your target lock. Since the FCS and K6 cost the same amount of points we know that the droid is now underpowered in the game.
So what kind of fix does K6 need? We could just make it simple by eliminating the chance and making K6 have a guaranteed target lock. However, this just makes him the FCS for astromechs and creates a boring repeat ability. We need something to give K6 some individualism and make it tempting to pick an astromech slot over a system. My suggestion is to keep the chance the same but make the reward bigger. Have a reprint card read: "When you acquire a target lock on an enemy ship, roll 1 defense die. On an evade result acquire a second target lock. That target lock may be used this round." Essentially, K6 would now give a 38% chance of getting two target locks and thus allow you to fire a modified torpedo right then.
Not only would this bring K6 back up to playing level, it would add some spice to the dull ordnance play in the meta. And it would provide some iconic application. In the Star Wars universe K6 is Garven Dreis's droid. You might know him as Red Leader from the Battle of the First Death Star. However K6's ability doesn't really make sense when applied to this battle. Garven locked onto the port vent of the Death Star but after he fired he didn't need to reacquire another target lock. If K6's ability were to provide a second, modifying target lock then it would add to the lore. Garven would've had the perfect shot and yet he still missed. While on the other hand a farm boy in tune with the force made the shot with a Deadeye focus. Moreover, Garven's ability in game means that you never want to take a target lock. With the help of a new K6, Garven could take 2 locks to use in the coming rounds then take focuses for his next actions to help his allies.

R5-P9 - 3 Points
P9 is a decent droid and pretty straight forward. If you have a focus left over during the end phase he can turn it into a shield recharge. He works really well when paired with allies like Kyle or Garven who can help make sure he has that leftover focus. The only thing I will say about this droid is that I wish he was generic rather than unique. A squad of Rookies each with a P9 could help bring X-wings back to the competitive table.
R7 Astromech - 2 Points
 The R7 astromech is the last generic droid on our list. In the lore the R7 was actually designed by Alliance engineers specifically for the E-wings. And in the Miniatures world the droid does work well with the E-wing, especially when paired with a FCS. It is also a great combo when paired with Tarn Mison's ability, allowing him to use his free target lock for defense.
But the main reason why I love the R7 unit is because it adds to the Target Lock Action. The reroll of a target lock gives you around the same benefit offensively as a focus. Because of this most people only take a lock when they need to fire ordnance or when they don't have a shot and want to save it for next round. But R7 adds a fun change. A defensive target lock can be use in 360 degrees, even if your ship can only fire forward. And a ship with R7 can take a target lock for offense, then switch it over for defense if they get outmaneuvered.
Another great twist is the application of the rules on dice modification. They state that when a defender modifies the dice of the attacker it happens before the attacker's own modification. This means that you can use R7 to interrupt an attack and waste an opponent's attack modification points. Suppose you get shot by a HLC and the attacker gets 2 hits. If he has a target lock, Lone Wolf, or Predator reroll then he has a good chance of boosting that attack. But before he can modify you can spend your defense target lock and reroll all of his dice. On average your reroll will produce a dice result that is the same as, or worse, than the original. And dice can only be rerolled once so now the attacker has no way of improving his result. Just like with R4, you have wasted enemy upgrades dedicated to offense. And since R7 is generic that means you can take a whole squad of 'em.
R7-T1 - 3 Points
 His nickname is RT in the books yet most players refer to him as the Boost Droid. If used correctly he can provide you an engine boost and a target lock every turn. However, his ability does require a hard set of parameters to be filled.
Here's the secret to using RT: he is a pilot skill grab. If you place him on a high PS ship and your enemy has lower pilots, he will terrorize them. But if you are against a higher pilot ship then RT won't help you. This is because the ability can only be activated after you move. If you are the highest skill pilot on the board then you can fly into enemy arcs and boost in for the kill or boost out of their shot. Either way you are safe because you know that the enemy ships have already moved. Logically, it is the exact opposite when your ship has the lower pilot skill. You can boost in for the kill but the enemy will move away and you can try to boost to safely but the enemy will follow right behind you.
So if you take RT be sure to back him up with high pilot skill. He works really well on Luke, Wedge, or Corran with Veteran Instincts. Horton is another good pilot to pair with because the droid gives the slow Y-wing a big advancement in maneuverability. However, be extra careful with this combo because Horton can't take VI and will be vulnerable to enemy aces. If you do want to use Horton, or any lower pilot skill ship, then run RT alongside with Intelligence Agents. That way you can know enemy movements and can better judge when to use your boost action. With any of the aces you pick also consider giving them a torpedo. It is really easy to take a target lock, boost out from an enemy attack, and save the lock for another round. Have fun experimenting with this unique ability.
And there you have it. 12 different droids but only 1 slot per ship. Which of these droids will you pick? Which is your favorite? Let me know in the comments. I hope you enjoyed this analysis and learned something new. Have fun shopping for droids!
Monday, August 10, 2015
Well, C'mon Red, Let's Go! - Deciding Which Astromech Your Rebel Pilot Should Take, Part 1
Some of the most memorable and fun moments of the Star Wars universe don't come from the main characters but rather from side-kick droids. The archetype of this is our best friend R2-D2. So you can imagine how exuberant I was when I learned that Astromechs were an integral part of the X-wing Miniature game. Right from the start you can open up your core set and fly Luke Skywalker with Artoo!
But when it comes to choosing droids for squad lists in the game you must be very judicial. Most of them are unique and a few are actually underpowered in the current meta. Moreover, you are limited in squad points and only having one droid slot per ship. This article is the first in which I will give commentary on which droid a player should take as well as discuss ways that underpowered droids could possibly be fixed. Let's start with the R2, R3, and R4 Series.
R2 Astromech - 1 Point

 Each of the three ships with astromech slots receives a great benefit when paired with an R2 unit. Both the X and the E receive 4 new green moves and combine well with self-stress talents. While on the E it can also be paired with Advanced Sensors. For example, Corran Horn could take an action before moving, Push the Limit for a second action, then do 1 of 9 green moves to remove the stress. However, where it shines the most is on the Y-wing becuase it raises the number of green moves from 2 to 8! This allows the option of creating a jousting Y. Even though Rebel Warthogs can't gain action economy from the R4 Agro, they can recieve greater jousting power using the R2 Astromech.
R2-D2 - 4 Points
Everybody knows R2-D2 so I'm not going to spend much time writing about him. To learn about how he works in-game just take him out for a test run and I can promise that you will fall in love with him. The only thing to keep in mind when using him is that you need to fly unpredictably. Since your opponent is going to expect you to do green moves you need to learn how to feign. Nothing is more exhilarating than when your opponent thinks you will do a green but you fly off on a wild white move. More often than not the enemy ships will be out of position which allows you to make an unpressured green move next turn while they recover. And also, don't put him on a Y-wing, trust me.

R2-D6 - 1 Point
At first glance this droid looks like it gives your pilot an elite talent. However, we need to remember that the cost of an upgrade card must include the use of its slot. What R2-D6 truly does is replace your astromech slot with an elite talent slot, similar to how the E2 card replaces the B-wing's mod slot for a crew. The only reason to use this droid is if your squad requires a ship with the astromech slot that isn't using it and needs an EPT. One fun application of this is on middle pilot skill generics. Consider putting Deadeye on a Grey Squad pilot with torpedoes or possibly combine a Red Squad pilot with Lightning reflexes. One of the most famous combos is a PS 8 Garven with Veteran Instincts. Bottom line: remember that whichever EPT you choose is costing you one extra point.
R2-F2 - 3 Points
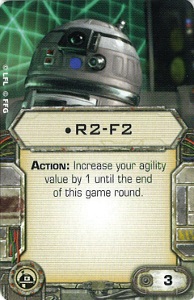 A lot of players incorrectly believe that this droid is underpowered but that is actually because they use it wrong. In theory it always sounds better to get an extra dice, right? This isn't always true because dice modification actions are very powerful. Let's use the example of an X-wing. Statistically, 3 unmodified defense dice give you less evade results than 2 defense dice with a focus token. The current meta states that if you want to take this droid then you also need to have good action economy to get a focus, such as Biggs with F2 and the Experimental Interface.
However, when we look back at the statistics we find that there is another application. The dice comparison I just stated before only applies when you are facing an enemy ship one to one. What if your ship is being attacked by multiple enemies? Let's use the minimum example of two enemy ships. 6 unmodified defense dice (3 dice x 2 attacks) roll an average of 2.25 evades. On the other hand, 4 defense dice (2 dice x 2 attacks) with 2 having access to a focus only roll an average of 2 evades. This is because once the focus token is used it is gone and the rest of your rolls are unmodified.
That is why F2 is included in the core set. The X-wing doesn't have a barrel roll and can't move away when it makes a bad maneuver. This can be really devastating in a Beginner game when both Ties outmaneuver the X and have clean shots. But if the X-wing has F2 then it can mitigate the damage by boosting both its average and extreme evade results. And this effect is even more powerful when playing a Standard game. For each additional attacker, the 3 unmodified dice get proportionally more powerful. If Biggs is facing a squad of 4 attackers, he will get an average of 4.5 evades with F2 and only 3.5 with a plain focus.
What about the E-wing? The math shows that a boost from 3 to 4 defense dice doesn't justify the loss of the focus until you are being shot at by at least 3 attackers. And honestly, if your E-wing is getting shot at by 3 enemies in one turn, you're flying it wrong. So don't use F2 on the E-wing. As for the Y-wing, that is a complete opposite story. Using a focus token on 1 defense dice is actually a big waste and this is reflected in the numbers. When you boost from 1 to 2 defense dice, you always receive an increase in evade averages, despite the numbers of attackers. So if you want to fly a Y-wing geared for defense then this is the droid for you.
R3-A2 - 2 Points
 Nicknamed the Stress Bot, this courageous guy is probably one of the most popular droids. He works quite simply: if you can shoot an enemy in your forward arc then you can also stress him. The ability gives yourself a stress as well but it is worth it because it is a guaranteed result. If you take Flechette torpedoes then they are useless against large ships and if you take a Tactician then you have to fly in precision to get range 2. But A2 isn't limited by any of that and always stresses whichever ship you point him at. All you need to do is make sure that you properly deal with the stress you are receiving.
I wouldn't put A2 on an E-wing since the ship is reliant on actions. But this is a good choice for X's and Y's. The X-wing has enough low green maneuvers that it can slow play an enemy, re-stressing it for multiple turns. Equip Luke with A2, Veteran Instincts, and an Engine Boost and he can stress and hunt most enemy Ace pilots. Or you can consider pairing this droid with Hobbie or Porkins. Both of them are efficient at removing stress from themselves and so excel at using A2. And he is also great when paired with a Y-wing: an Ion Warthog can lock down a lane, ionizing and stressing anything that gets in his path.
R4-D6 - 1 Point
 This droid is hilariously awesome but, sadly, he do not see much competitive use. This is because he is the "worst case scenario" droid. I know for me, I don't like to admit that I can get stuck in horrible situations. I mean, I'm too good of flyer, right? Alas, that is human nature and it isn't easy for people to say they make mistakes and that they could use a safety net. But when we realize this, we find that R4-D6 becomes one of the BEST droids in the game.
Here's the break down. In X-wing Miniatures, the gameplay is favored towards offense. This promotes a game style that is always progressing towards the endgame and rarely gets stuck. When you look at the big picture, powerful attacks are far cheaper than powerful defenses. Think about it. The Predator upgrade costs 3 points and allows you to reroll up to two attack dice. Flight Instructor, its counterpart card, costs 4 points and only allows 1 defensive reroll. Another example is Plasma Torpedoes vs the Shield Upgrade, both of which are 4 points. The former can do up to 5 damage to shields while the latter only adds 1 shield for defense.
But a bright, shining counterexample of this rule is R4-D6. He costs a mere 1 point, he doesn't take up your action, and there is no difficult circumstances to meet for his ability to work. Any hits you take over a base of 2 get converted into stress. Just take a moment to really apply this ability and you will see that R4 becomes the "Anti-HLC" droid. Consider an Outrider with Predator and an HLC. When it faces R4 it is literally wasting 15 points because no matter what it does it can't give more than 2 hits! Another application to think about is when R4 is facing Soontir or Whisper. No matter what these pilots do, and no matter what range, they can do no more than 2 damage to your ship each turn.
A Y-wing with a Hull upgrade and R4 requires 5 enemy hits before it is finally killed. This probably isn't a viable strategy to counter swarms but it is amazing against 2 ship builds. Have your Y-wing fly point to protect the rest of your squad while you chase a running large ship. Or have him go up against the runner 1-to-1 while your other ships focus down the second ship hiding on the sidelines. If you equip the Y with a Twin Laser Turret he becomes a large ship hunter that can trade 2 damage for 2 every turn. R4 also works well with E-wings and X-wings. Suppose you have a squad where you want an arc dodging E or X but you just don't have enough points left over for R2-D2. Well now you can take R4 and he can be a big help. He won't recharge your shields but he can make sure an enemy doesn't damage your hull if you make a wrong move and your dice fail you. So don't be scared to take R4. It is wise, not foolish, to admit that you can't avoid all the nasty battle scenarios out there. He might just be the hinge on which you survive and win a match.
That is the first half of the Astromechs. Stay tuned for the second half where I will cover the R5 and the R7 series. Thanks for reading! Comments are appreciated and encouraged.
Friday, July 31, 2015
Do A Barrel Roll! - Discussing the Idea of an X-wing Barrel Roll Refit

When deciding on a change in the
X-wing game, one must keep several things in mind. First off, a change must
have an appropriate cost that maintains overall balance with all factions. Second, we want something that will add to the game and not just
be a repeat of other ships. Finally, any change should reflect the lore of Star
Wars and provide in-game representations of iconic moments in the films.
I've thought hard about what I
believe will provide the best buff to the X-wing. And after much consideration I
have settled on one idea that several other people have had online: The Barrel
Roll Action. Haha...no seriously. I believe this change will not just benefit
the X-wing but provide some iconic application as well as not rock the boat when it
comes to balance. However, I claim this as my opinion and not X-wing fact
so feel free to challenge me, albeit with tact. Let's have a refitting
discussion.
Problems
I want to start off by
mentioning what is wrong with the X-wing as it currently stands in the meta
game. There are namely three: (1) A lackluster torpedo slot, (2) lack of a maneuver
action, and (3) overly expensive in squad points. I primarily want to focus on
the latter two problems, mainly because we now have upgrades like Flechette and Plasma
torpedoes.
Lore
The first and foremost argument
is quite obvious: X-wings can barrel roll in the movies. Re-watch the films and
you will clearly see examples of it. During the Battle of the First Death Star, X-wings are seen to roll as they strafe the surface while their counterpart
Y-wings just lazily float along. Probably the most notable barrel roll scene is
when Wedge blasts Dark Curse and rolls out from the explosion, thus
sealing the deal on his awesomeness.
In the books and the expanded universe, the X-wing is supposed to be the best star fighter of its time. It has the perfect balance of speed, maneuverability, offensive power, and shielding. So it is somewhat of a surprise when the X-wing miniature has all but one, maneuverability.
In the books and the expanded universe, the X-wing is supposed to be the best star fighter of its time. It has the perfect balance of speed, maneuverability, offensive power, and shielding. So it is somewhat of a surprise when the X-wing miniature has all but one, maneuverability.
No Maneuver Action or Compensation
The X-wing actually sits in an
awkward spot in the Alliance Fleet. Most Rebel ships fit into one of two
categories; either they have (1) a movement action or (2) a turret. This makes
sense because outmaneuvering enemy ships can be really hard. If you have a movement
action then you can use it to fix incorrect flight choices. And if it has a turret it can fire in any direction that it wants.
However, there are two Rebel
ships that don't belong to either of these categories, the Z-95 and
the X-wing. The Z isn't affected by a lack of maneuverability because it is so
dirt cheap. You can easily include one or two in a squad where they can be
covered by their allies. Or you can bring a swarm of them and your enemy will
find it difficult to arc-dodge every single one. But what about the
X-wing? Regrettably, it doesn't have anything to help it outmaneuver an enemy nor
does it receive any compensation for why it can't. A poorly moved X-wing is a
21 point ship that only has 2 defense dice, a focus token, and a prayer that it
won't be blasted out of the sky. The X-wing has a serious gap here in the game
that needs addressing. So my suggestion is to give it some maneuverability
in the form of a barrel roll.
Point Cost
We know that the X-wing needs a
fix. So the next question to ask is how much would it cost? Here I bring in
Major Juggler's Math Wing analysis. According to him and his number crunching,
the generic X-wings are overcosted by about 2 points. Many people present that there
should be an upgrade card that decreases the X-wing's cost. But before a change
like this can be properly applied we must look at how the balance will change. This is especially true once you go lower than 21
points and can have 5 X-wings on the table. Instead, I submit that we give
the X-wing a 0 cost upgrade. That way it will raise the ship up to the squad
cost it was originally meant to be without disturbing the overall balance.
When we look at the Expert
Handling talent we can see that FFG places the value of the barrel roll action
at 2 points. That makes it a perfect fit to bring the true cost of the
X-wing to 21 points. However, we want to add choice variety to this game. So it should be an upgrade that you use if your squad
needs it rather than just a gimme that is always attached. For this reason, said barrel roll upgrade should be a X-wing Only Modification rather than a Title card. As I've said
before in many of my posts, the upgrade slot needs to be taken into account in
the cost of the card. So yes, I propose a 0 point X-wing upgrade. But it must
be chosen carefully because you have to give up your modification slot.
Generics vs Aces
The next thing to consider with
this change is how it will effect each X-wing pilot. Ace X pilots are
actually seen in competitive lists because their high pilot skill and
abilities justify their points. However, generic pilots are rarely seen. What we want from an X-wing upgrade is a big buff to Generics and a small
buff to Aces. Again referencing Math Wing: all X-wing pilots, except for 2, are
overcosted and can benefit from a 0 point barrel roll. The two that aren't
overcosted are Biggs and Wedge. However, I feel that a barrel roll modification
won't overpower either of these pilots.
First, it is completely counter
intuitive to barrel roll Biggs. He wants to stay near the ships he's escorting
and a barrel roll can take him out of Range 1. But more importantly, if Biggs
does a barrel roll he gives up his focus token. Any X-wing without a defense
focus token is pretty vulnerable but Biggs becomes a sitting duck. Moreover,
placing a barrel roll mod on Biggs means he doesn't have access to defensive
modifications or even the Experimental Interface.
It is somewhat the same with
Wedge. The most frequent version of him that I see in competitive lists includes
an Engine Upgrade. While a barrel roll mod would save him points, he would lose
both his modification slot and maneuvering options. And even if people do take
this mod for Wedge, he is still vulnerable to the normal set of counters: arc-dodgers,
high PS with Veteran Instincts, and low PS bombers.
Finally, the barrel roll action
gives a big buff to generic pilots. The reason for this is because generics primarily
have blocking power while aces have chasing power. A generic X-wing with a
natural barrel roll can better set up screens and slip into hard to reach
blocking positions. On the other hand, the X-wing has such a great maneuver dial that it doesn't
need the barrel roll as a crutch for strong chasing power.
Different From The B-wing
Speaking of ships reliant on the barrel roll...Won't an X-wing with a barrel roll make it too much like the
B-wing? My response is no. The barrel roll combined with the B-wing's
maneuver dial is an exceptionally different application from that of the X-wing's.
Not only does the B-wing need the barrel roll action to overcome its
horrible dial, it is actually a safer action for the ship. A B-wing that barrel rolls to get the shot and thus gives up its defense focus, honestly, really doesn't miss it. However it is riskier to give up the defensive focus of an
X-wing. This means you probably won't be barrel rolling in a your X-wing unless
you absolutely need to. And lastly, the B and X are just so fundamentally
different because of their
upgrade slots. A B-wing can still be unique with combinations of a cannon,
extra munitions, system, and/or crew member. And the X-wing is happy with its choice of astromechs.
Naming the Upgrade
When it comes to naming this
barrel roll modificaton, I think the Incom Refit is a nice fit. It pays homage
to the Chardaan company and their own A-wing refit. It makes sense to me that
these Star Fighter companies are continuously working on their designs and
improving them where they can. It helps hide the awkwardness of in-game changes
and introduces a little lore.
Perhaps another good name could be the actual modification Incom made to their T-65, such as the installation of Lateral S-Foil Thrusters. What would you name a barrel roll modification? Let me know in the comments below.
Perhaps another good name could be the actual modification Incom made to their T-65, such as the installation of Lateral S-Foil Thrusters. What would you name a barrel roll modification? Let me know in the comments below.
And there you have it. I present for your review the idea of giving the X-wing a Barrel Roll Action
Modification. Perhaps something like this will come in a Rebel Aces E&X pack. Or perhaps it can be a part of the new T-70 Resistance X-wing that FFG has rights to make. Let's hope for the best.
Afterwards:
I am aware
that an X-wing with a barrel roll action is also very much like an E-wing. But
seriously, the generic E-wing is also very overcosted and it could do with some changes
of its own. But that is a topic in and of itself.
Numbers on actual point costs of ships came from Major Juggler's Math Wing
Monday, July 27, 2015
My First X-wing Miniatures Repaint - The Poor Grey Pilot
After
a little research I found that acrylics work really well with miniatures. You
can go to game stores and find acrylics made just for miniatures or you can be
like me and go to a craft store. Craft acrylic paint is too thick and globs
easily on miniatures so if you are going to use it you need to thin it down
with some water. Once I got the desired color and constancy then I was ready to
paint. I wanted the smallest tip of paint brush that I could find so that my job wouldn't be overly hard. Using light dabs of paint, and a little patience, I carefully
painted over the gold patterns on my Y-wing. It didn't turn out perfect but
honestly, the slightly unkempt style works really well with the worn look of the
Y-wing.
The
art of the Gray pilots shows the painted stripe on the head to be more thin and
delicate than the one on my miniature. But not only would that have been a much
harder job, it wouldn't have let me cover up the yellow paint that is originally
there. Who knows, maybe in my next project I would take a try at stripping
paint and redoing it fully. Until then I am very content that my Poor Grey Pilot has a ship to call his own.


Tuesday, July 21, 2015
Application of the Plasma Torpedo - A Poor Grey Pilot Strategy Update
We
are part of a game and universe that is alive so we always need to
keep learning or else we will get lost and outdated. Even in the last few
months I have had to grow and change, myself. I had just barely learned and mastered
the 4-ship Joust when I was broadsided by 2-ship Arc Dodging builds. But even
though I am aware of them now, I know that there are other things out there
that I am completely unaware of. If we plan to not get taken by surprise with
every new thing that comes our way, we need to make sure that we are rising beyond
normal gameplay and learning the trends.
When
FFG announced the details of the new K-wing I made a few predictions about how
this next wave would affect the meta game. However, what I didn't cover in that
article was what I planned to doing about said predictions. If we see a new
Wave of X-wing come in and don't act on it then we are going to float aimlessly
just as much as if they were waves of the ocean. However,
applying new chances doesn't mean we toss the old stuff out the window. Instead
it means that we take what we have and build upon it, thus create something
both new and improved. So, without
further ado, I will roll up my sleeves and start applying patches to the tactics
I've discussed on this blog, starting with the application of the Plasma Torpedo.
Here is the first Poor Grey Pilot Strategy Update.
The first thing that we need
to note about the Plasma Torpedo is that it is still a torpedo card. And as
such it still has the main weakness of ordnance: lack of dice modification. So
if we want to use these effectively we still need to follow the same rules of fixing
ordnance. Let's take a look again at Horton Salm's ability. His rerolling of
blanks works great with any torpedo but he has to take a target lock and so
doesn't have access to a focus. The Proton Torpedo's critical focus overcomes that deficiency and allowes Horton to give 4 hits almost every time. Because of
this Pilot-Torpedo-Dice synergy I've had a really hard time justifying putting
any other missile on his Y-wing.
But
now consider the possibility of the
Plasma Torpedo. Recall that a 4 dice roll averages the result of 2 hits/crits,
1 focus, and 1 blank. So when Horton shoots a Plasma Torpedo, he is going to be
frustrated by the focus result and only get an average of 3 hits. This would be
enough to dissuade me except for the fact that the Plasma Torpedo
brings a new ability to the table. If the torpedo hits, you get an extra free
shield damage. With this added ability Horton again gets an average of 4 hits
on his torpedo and, moreover, has the possibility of doing 5 shield damage.
There is only one hitch to this plan: your potential target must be both low
agility and heavily shielded. This means that instead of hunting Ties with
Proton Torpedoes, Horton will now excel at targeting large ships and turrets.
I
am more than ok with this change. Honestly, if I'd had Plasmas during my last
tournament, I would have had a better chance fighting the 2-ship builds I
faced. And in general you will have a better statistical chance of facing shielded targets
because Ties are currently the minority in ship diversity. This makes Plasma Torpedoes
a safer, and yet still-reliable, pick when composing your squad. So have fun
trying it out.
Y-wing w/ Horton - 30 points
Plasma
Torpedoes
Extra
Munitions
Moving
right along we return to our Damsel Nera. She has a wonderful pilot ability and
becomes efficient with ordnance when paired with Deadeye and Recon Specialist. However, she has the exact opposite problem as Horton; while
he has no focus, she has too much. This means that Proton Torpedoes waste some
of her focus modification and that is especially bad since Nera can't correct
blank rolls. This leaves Flechettes or APTs and while both are good choices
they have their downsides. The former doesn't pack a very hard hit while the
latter is severally limited in range.
You
know where I am going with this: the Plasma Torpedo fits right into this
missing niche for Nera. It doesn't waste any of her focus modification, it has
a much better range to work with, and it hits hard enough that it can
potentially be as powerful as an Advanced Proton Torpedo. And since it is the
second cheapest torpedo to get, you will actually save some squad points.
The
one downside is that Nera has a range 1 blind spot and her
lower PS means many ships will move after her. One way to overcome this is to
exchange the Recon Specialist with an Intelligence Agent. (but it's ok, she's a
girl too!) Then give Nera the Push the Limit upgrade instead of Deadeye and now
you have a ship that can see where a higher ace is going, barrel roll out of
the way, take a target lock, and then shoot a torpedo in a 360 degree arc. You
do lose your modification on your shot but the extra maneuverability might just
be the key to her survival. And more than that, it means that Nera will be
strong against arc-dodgers as well as jousters and heavily shielded turrets.
B-wing w/ Nera - 36 points
Push
the Limit
Plasma
Torpedoes
Extra
Munitions
E2
Mod w/ Intelligence Agent
Reevaluating
the B-wing
In
my article discussing the X-wing versus the B-wing I talked about how a player
shouldn't just believe the masses and fly what everyone says is good. It is
much wiser to know the strengths and risks of all ships and to take the ones
that fit the roles you need for your squad. With the game being on the event horizon
of Wave 7, I reiterate that one should
not just blindly take a B-wing. The introduction of the Plasma Torpedo will
become the bane of the B. The ship currently holds the title for #1
Jouster but all of that changes when the opposing side has plasma shots. A
fully modified Plasma Torpedo will give 4 hits plus
1 shield damage. And good luck dodging that, Mr. 1 Agility. Oh and be
sure to kiss your shields goodbye.
In this situation, the X-wing is actually a better jouster. Having 2
agility dice and only 2 shields, the X has a high chance of taking only 2
damage instead of 5 from an early plasma hit. And after the shields are gone, Bs
don't last nearly as long as Xs . However, switching to X-wings is only one
option. You can also consider other alternatives including putting Jan Ors
as a crew so your B-wings have evade actions. Or you
can fly more Ace B-wings and fewer generics. Not only will the Aces give you a better
chance to barrel roll away from potential attackers, it gives you access to the
Expert Handling upgrade which allows you to shed enemy target locks. A missile
that can't be fired is a missile that won't be bothering you. And these are
just a few of the options for the change in B-wing meta. Let me know in the
comments how you plan on flying your B-wings differently.
B-wing w/ Keyan - 34 points
Expert
Handling
Experimental Interface
Experimental Interface
HLC vs 2
Plasmas
I mentioned it in passing before
but I was serious about it. Double Plasma Torpedoes can potentially be more
powerful than a Heavy Laser Cannon. Yes, you do give up your action to shoot
torpedoes but that disadvantage is mitigated in several ways. First off, double
plasmas costs 2 points less than a HLC and, honestly, a small ship with a HLC
isn't going to get more than 2 shots before being focused down. This cost is
further reduced because there are ships with double torpedo tubes that are
cheaper than ships with cannon slots. The second mitigation is the fact that a
Plasma Torpedo can do up to 5 damage to shields and also give criticals to low
shielded targets, neither of which the HLC is capable of. I'm not saying that there
is no more need for this cannon, there are still plenty of applications. But
now there is an alternative build involving torpedoes that is just as viable. I
know I can't wait to get it and try it out.
Bomber w/ Scimitar - 23 Points
Plasma
Torpedoes
Extra
Munitions
Seismic
Charges
Y-wing w/ Grey - 27 Points
Plasma
Torpedoes
Extra
Munitions
Autoblaster
Turret
B-wing w/ Blue - 29 Points
Heavy
Laser Cannon
Hull Upgrade
with Determination
Last
thing I want to discuss. When it comes to strengthening your defense there has
always been 3 options for modification: Stealth Device, Hull Upgrade, and
Shield Upgrade. I know that there are good applications for the Stealth Device
but I have never liked relying on it. I have always been a fan of
attaching more shields to things. Got an extra 4 points? Stick a shield on a
Bomber or Tie Fighter, it can be a really game changer. Or add a shield upgrade
to an X-wing or A-wing to make them both beefy and evasive. But that has
changed now that Plasma torpedoes are a risk. It now can be a danger to add
more shields because they can just be mopped away with a plasma hit. That's
more wasted points than getting all blanks and losing your Stealth Device.
But
here is a fun little trick I have learned. If you've got a ship with an Elite
Pilot Talent that you aren't using, consider giving it a Hull Upgrade and Determination.
It costs the same as a Shield upgrade and it does the same thing, but in a different
way. Take Howlrunner for example. Give her a Shield Upgrade and she can block
an early critical. On the other hand if we give her a Hull Upgrade and
Determination then she has a 25% chance of absorbing a critical across each of
her hull points. Since Howlrunner will have 4 hull, she has a good chance of
absorbing one critical and if she does, she still has that hull left. It is a
bit of risk but it has a good chance for payout, similar to setting your shields
on double front and hoping you don't get hit from behind. And this combo is
even more powerful than before because it isn't hurt by plasma hits. Kavil
with a Shield upgrade will just get it stripped off when hit by a torpedo. But if
he has a Hull Upgrade and Determination he doesn't have that risk, plus each of
his 6 hull points has a 1/4 chance of absorbing a critical for a total of 1.5
average. Now that is a bargain in defensive cost.
Tie Fighter w/ Howlrunner - 22 Points
Determination
Hull
Upgrade
Y-wing w/ Kavil - 34 points
Determination
Blaster
Turret
R4
Agromech
Hull
Upgrade
These are the applications I plan on making with the coming
of the Plasma Torpedo. Thank you for reading. I hope you enjoy this blog and
feel free to leave any comments or questions. Stay tuned for my next update
where I will apply the Twin Laser Turret, especially to the Rebel Hawk Pilots.
See you then.
Afterwards:
Note that a Plasma Y-wing is so much cheaper than a HLC B-wing that I was able to give it an Autoturret, upgrade its PS, and still have points to spare. The higher PS will allow the ship more opportunities to get its target lock.
The Keyan build was provided by Kevin Wadsworth.
Afterwards:
Note that a Plasma Y-wing is so much cheaper than a HLC B-wing that I was able to give it an Autoturret, upgrade its PS, and still have points to spare. The higher PS will allow the ship more opportunities to get its target lock.
The Keyan build was provided by Kevin Wadsworth.
Saturday, July 11, 2015
Learning to Fight Dirty - A Guide to Illicit Scum & Villainy Combat Strategy
In my opinion, the introduction
of the third faction brought the X-wing Miniatures game up to that same great level.
The Scum faction looks, flies, and acts completely different from the other two
but it is balanced and locks perfectly into its place in the miniatures world. And
because of my desire to learn I dived right in; it was time to learn to fight
dirty.
To start out I want to briefly
talk about the other two factions. Don't get me wrong, the Imperial and Rebel
factions were perfectly balanced and autonomous before the introduction of Scum. Rebel ships are inherently more powerful, usually sporting high
attack dice while Imperials hold the advantage in number of ships. Imperial
starfighers are fast, nimble, and evasive but the Rebel ships always have shields
for protection. And to complement gameplay both sides have ample access to
synergy-based abilities to make their squads stronger when working together. Either
style has strengths and weaknesses and when mastered can be deadly. However, the whole system was thrown when the Pirates came to play. They don't go by the rules and always carry a
few tricks up their sleeves. Let's take a closer look at what the Scum &
Villainy Faction has to offer us for the X-wing game and find out if it's your
style of flying.
Anti-Synergy
First off, Pirates toss the concept
of squad flying out the window. These pilots are bloodthirsty and cutthroat.
Though they are looking for the win as a whole, that is only their secondary objective.
The number one priority is that they make it out alive and they don't care how
many of their squad mates die in the process. (Yeah, Kaa'to and Xizor, I'm
talking to you). Because of the type of ships and abilities available to Scum they
are much more efficient at solo flying and swarming. If you group in a
formation you may find that the extra protection your squad gets isn't worth
the restricted efficiency it enforces. FFG wrote about this in their article
on the new Kihraxz fighter. They said that these fighters would suffer if
forced to fly in formation. Instead they are much better at facing opponents
one on one. When flying your scum squad, consider breaking them off into
different vectors at the beginning thus forcing your opponent to split or get
surrounded.
Another strong strategy of the
Scum faction is to destroy the synergy of the opposing team. Scum Hawks are not
just annoying but downright nasty. Palob Godalhi strips an enemy ship of its
focus or evade token and takes it for himself. Or you can pick Trokil Mux, who
can force an enemy down to Pilot Skill 0 during the combat phase. Both of these
support abilities are quite strong and can allow the rest of your pirate ships to
overpower a flat-footed opponent.
The M3-A Interceptor also does a good job of breaking the enemy's synergy. The ship hasn't received much use because players see
them as expensive, inefficient Tie Fighters. But that is not their strength at
all. The M3's niche is in being the cheapest cannon ship in the game. Apply the
title card to the M3 and you have a Heavy Scyk which can equip a torpedo,
missile, or cannon. Torpedoes are expensive and the Heavy Scyk doesn't have the
second slot needed for Extra Munitions. And Headhunters, with their low cost
and natural missile upgrade, make far cheaper Missile Boats. So let's instead
focus on the cannon. A Heavy Scyk with an Ion or Flechette cannon can only do
one max damage a turn. But in exchange it can use the cannon the whole game and
give an ion or stress token every round. With just one of these you can
seriously mess up an enemy formation or synergy-type build. As I said before,
they are cheapest of their kind to make, coming it at a lower cost than even the
Ion Y-wing. As for the other types of cannons, feel free to experiment with
them but be careful, they are pretty expensive.
Illicit
Weaponry
When I first read the title of
these of upgrades I laughed. All is fair in love and war, right? If there was
some new type of black market weaponry I'm pretty sure the Empire or Rebels
wouldn't hesitate to get their hands on it. But I thought about the word illicit some more and what I realized made me cringe. These upgrades aren't
called illicit because they are illegal but instead because they are inhumane.
Even though the Empire was founded on the Dark Side of the force, and therefore
evil, at least they still had some honor about life. These illicits aren't what
any sane Imperial or Rebel General would choose to subject their soldiers too. Its
only the Scum of the galaxy that are willing to use them to gain the victory.
Inertial Dampeners: If you have ever read the Honor Harrington
series by David Weber you'll have experinced firsthand what happens to a human being
in a space ship that accelerates with broken Inertial Compensators. Ugh... Even
though some of the Physics are different between the Honor and Star Wars
universes, inertia plays a role in both. That is why it stresses a Shuttle to
do a 0 move and stay still. Up until this last year, the Shuttle was only ship
that could do that maneuver. But this changed when Pirate fleets started
rigging their ships with Inertial Dampeners. Now, once a game, a ship with an
Inertial Dampener can pull a stressful 0 move. This can get your ship away from
a chaser and also get you into better position to shoot. However, take note
that the upgrade says "dampen" and not "eliminate". I don't
even want to think about what kind of g-forces those pilots are experiencing
but I think it is safe to bet that it lowers their already short life
expectancy.
Glitterstim: Now this is an upgrade. Glitterstim was a spice
produced as a recreational drug but users found that it also provided temporary
psychic abilities. So of course, it found its way onto the battlefield. For only
two points, a pilot gets a one-shot item that changes all focuses that round
into hits and evades. And it doesn't even cost them their action! This can
change an initial jousting Scum swarm from becoming the victims to being the
killers. And it provides necessary survivability to Lone Wolf ships, adding
strength to the already power strategy of creating a pincer from all sides. But
glitterstim is dangerous. Sustained use of it atrophies the brain and people
almost always overdose on it. So be careful out there, spice users, there's a
reason FFG only lets you stim once a game!
Dead Man's Switch: If you've played any Star Wars FPS video game
then you have been lied to. Whether its Jedi Outcast, Battlefront, or Republic
Commando, the game makers give a wrong interpretation of the Thermal Detonator.
They present the weapon like a normal grenade that you toss at group of enemies
for a little bit of splash damage. But that is not the case! Thermal detonators
are actually the Holy Hand Grenade of the Star Wars universe. When Princess
Leia, disguised as a bounty hunter, threatened Jabba the Hutt with one it was a
real and legitimate threat. That one detonator would have vaporized EVERYONE in
the room if she had set it off.
So when you see a Pirate who has
upgraded his ship with the Dead Man's Switch, be very careful. The art on the
card shows a Gran pilot with two Thermal Detonators. 2 detonators for 2 points.
It turns a normal ship into a bomb that explodes when it dies and sprays the
shrapnel of its own hull at a blast radius of Range 1. ANY ship within that
radius receives a damage. Put this on an Aggressor and you have a large base
ship ready to get up close and personal. Or if you're really feeling sadistic
then rig exploseives to a pair of Binayre Pirate and force them to fly point
during an initial joust. They cost the same amount as Biggs with a droid and,
seriously, they'll be just as efficient at drawing fire.
Feedback Array: At first glance this card looks pretty bad. No one
wants to give up their attack and
ionize themselves. But there are 2 amazing things about this upgrade that one
must understand. The first is that it is a guaranteed hit, just like the Darth
Vader upgrade. But the second thing makes it even better than Vader in my mind:
it isn't limited to your firing arc. It may not be labeled as a turret upgrade
but the card allows you to attack any enemy at Range 1. That means Aggressors,
Headhunters, and other illicit ships can equip a guaranteed Range 1 turret for a
price. If you are willing to pay the price then it can be a powerful
tactic.
Teaching
an Old Y New Tricks
A fun thing that the Scum
faction does is take previous ships in the X-wing game and put a whole new
twist on them. The Most Wanted expansion pack is probably one of the best
bank-for-your-buck purchases you can make. Not only does it add 1 Scum Y-wing
and 2 Scum Headhunters to your fleet, it also provides the necessary cards and
dials to turn 1 Imperial Firespray, 1 Rebel Hawk, and 1 Rebel Y-wing into scum
ships as well. That's a max of 6 ships from one expansion! I've already
mentioned some of the changes that Scum Hawks and Headhunters bring to the
table. And there are plenty of good changes for the Firespray as well. But what
I really want to focus on is the big changes in the Y-wing.
The Bomber Y-wing: The first upgrade included is the bomb
conversion slot. You place it as a torpedo upgrade and it converts it into a
bomb slot. This brings a whole new role to the Y and can really catch people
off guard if they are not used to it. It is important to note that the card
says "Limited". This means that you cannot equip two bomb slots onto
a Y-wing. However, don't be discouraged because this can easily be overcome
with the Extra Munitions card. It doesn't allow you to have 2 different types of bombs, just double of the same. But the fun doesn't stop there. A Scum Y
bomber can equip Genius, a named
droid for a cheap 0 points. He allows your bomber to place a bomb after you
move instead of before. And if you want to go really crazy then attach an engine upgrade so
you can move, drop, and then boost away to not get hit by your own Proton Bomb.
This makes for a fun and fast Y-wing experience.
The Autoturret Y-wing: The Most Wanted pack also introduced the
Autoblaster Turret. We have seen this ability before as the cannon upgrade from
the B-wing. However when the Autocannon came out it was far too expensive and
didn't hit very hard. The latter problem was fixed in a FAQ rules update: evade
tokens are now considered a dice result and therefore cannot block an
Autoblaster attack. The other problem was fixed when FFG made the Autoturret
cost only 2 points. But wait a second, when you switch from an Autocannon to an
Autoturret you lose 1 attack dice but gain 3 squad points? That seems too good to be true.
And that is because it is. The
main reason why the Autoturret is so cheap is because it forces you to give up
your turret slot. Think about it. A Y-wing or Hawk's turret is its lifeblood.
Without it, neither ship would be worth their points on the battlefield. So
yes, an Autoturret is very cost efficient but its range serverly hinders its effectiveness. So you need to learn to fly an Autoturret Y-wing in the
right way. Consider the Y-wing bomber I previously mentioned. You
can use the engine upgrade to make sure you get into range 1 and always get a
shot. Or perhaps you want to use the pilot Kavil. His ability gives him an extra
dice outside his firing arc, giving him a deadly 3 dice Autoturret attack.
Experiment with it and see what works for you.
The Warthog Y-wing: The last Y upgrade you get is the Y-wing Title
Card. A BTL-A4 Y-wing, nicknamed the Warthog, costs an additional 0 points to
make. It turns your Y's turret upgrade into a double tap cannon. And although
the Rebellion has access to this upgrade as well, the Scum faction still holds
the monopoly on effective Warthogs because of their salvaged droids.
The first is the Unhinged
Astromech. Coming in at 1 point, it is the socially awkward cousin of the R2
Astromech. They both give more green maneuvers to a ship but they do it in
different ways. The R2 makes all 1 and 2 speeds green. This gives the Y-wing 6
more green moves and greatly reduces its weakness to stress. The Unhinged on
the other hand has a bit more of a punch to it. It changes all 3 speeds to
green which only gives the Y 5 more green moves. But at the same time it
changes the 3 speed turns from red to green. This frees up its movement dial
and makes the Y-wing much faster.
But what if you don't care about
movement? Another really strong option for the Warthog is the R4 Agromech. I
had no idea what that droid was and so I had to look it up. But just like the
name suggests the Agromech is a stinkin' farming droid! The company that makes
Astromechs for space travel also wanted to
get in on the agricultural business. So they made a few modifications and
started selling droids to farmers. Underground organizations caught onto this
and made a startling discovery: it was quite simple to reverse engineer the
changes to again make the droids space-ready. Furthermore, buying bulk
Agromechs instead of Astromechs prevented the local authorities from being
tipped off.
Because of this we have one of
the best combat droids in the X-wing game. When you spend an offensive focus
token you can acquire a target lock on the defender which you can immediately use in your second attack.. This gives your Warthog
the equivalent of a Fire Control system. The composion of this type of Y-wing actually paved way for a new viable build:
4 Warthogs with Ion turrets and R4 Agromechs. At range 1-2 this squad can dish out 8 modified attacks, giving between 12-16
damage as well as 4 ion tokens.
In summary, Pirates don't
fight in the traditional fashion and work hard to mess up their opponent's strategy. They like to operate solo and have their hands on a whole score of illicit
upgrades to give them the advantage. And finally they take new and
interesting twists on old ships to make them just as deadly as others on the battlefield.
So try out the Scum & Villainy faction and get your hands dirty. You might even
find yourself having some fun.
Subscribe to:
Posts (Atom)